Feeds:
Posts
Comments

Posts Tagged ‘Holiday’

2013_holiday_438

I really don’t like malls.  They’re all the same stores, same basic layout, same corporate look.  But every now and then (yes, especially this time of year), I’ll drop in.  When I go, my favorite in this area is Tyson’s Corner/Tyson’s Galleria – mainly because they have the best Apple store in the area AND Anthropologie.

But, much as I love both those stores, there’s still a bit of that corporate-ness to them (this shop window, is just an example of what I’m saying).

And then I found Free People:

IMG_3820

Firstly, I just love these spectacular doors.  And it’s the details that make this for me:  the gravel “pavement” with the cute bike parked outside, the bronze doors that look like it’s a pavilion plucked from the Tuilleries Gardens in Paris.

IMG_3814

And then you walk in to hardwood floors (no big surprise, or exception there), charming clothes and accessories, and – here’s the part I love – handmade holiday decorations!  Yes, the staff at Free People made this adorable pom poms them selves, and set up this charming display.

IMG_3815

And I’m always a sucker for incorporating natural elements in displays of any kind.

IMG_3816

And don’t they just plain look fun to make? IMG_3818

These pretty cones are a nice complement (not sure if they made these, too).

IMG_3819

I was surprised to find this level of personality in a corporate store.  Kudos Free People.

Happy Holiday shopping to you!

Thanks for reading,

Virginia

Read Full Post »

Snow!

What better to put you in the Christmas spirit than a December snow? And we’re already on our second one here in Buckeystown, Maryland! I’ve lived in this area all my life (eg. a very long time . . .) and cannot recall a December with two early snows, especially over 6″ (the mid-Maryland definition of a decent snow).

So how am I celebrating this natural phenomenon? Sipping french vanilla coffee, in pajamas and slippers, ensconced in my down-cushioned sofa, watching the snow fall outside our wall of windows. Ahh, contentment . . .

IMG_3877

What I awoke to this morning:

IMG_3874

And a few images from Sunday’s snow:


IMG_3875

IMG_3862

IMG_3861

I think the 14′ Christmas tree, which I struggled all month to decorate (and keep upright!), looks spectacular the way Nature has trimmed it.  The ultimate flocking!

If you got some snow, I’d love to see pictures of it!

Thanks for reading,

Virginia


Read Full Post »

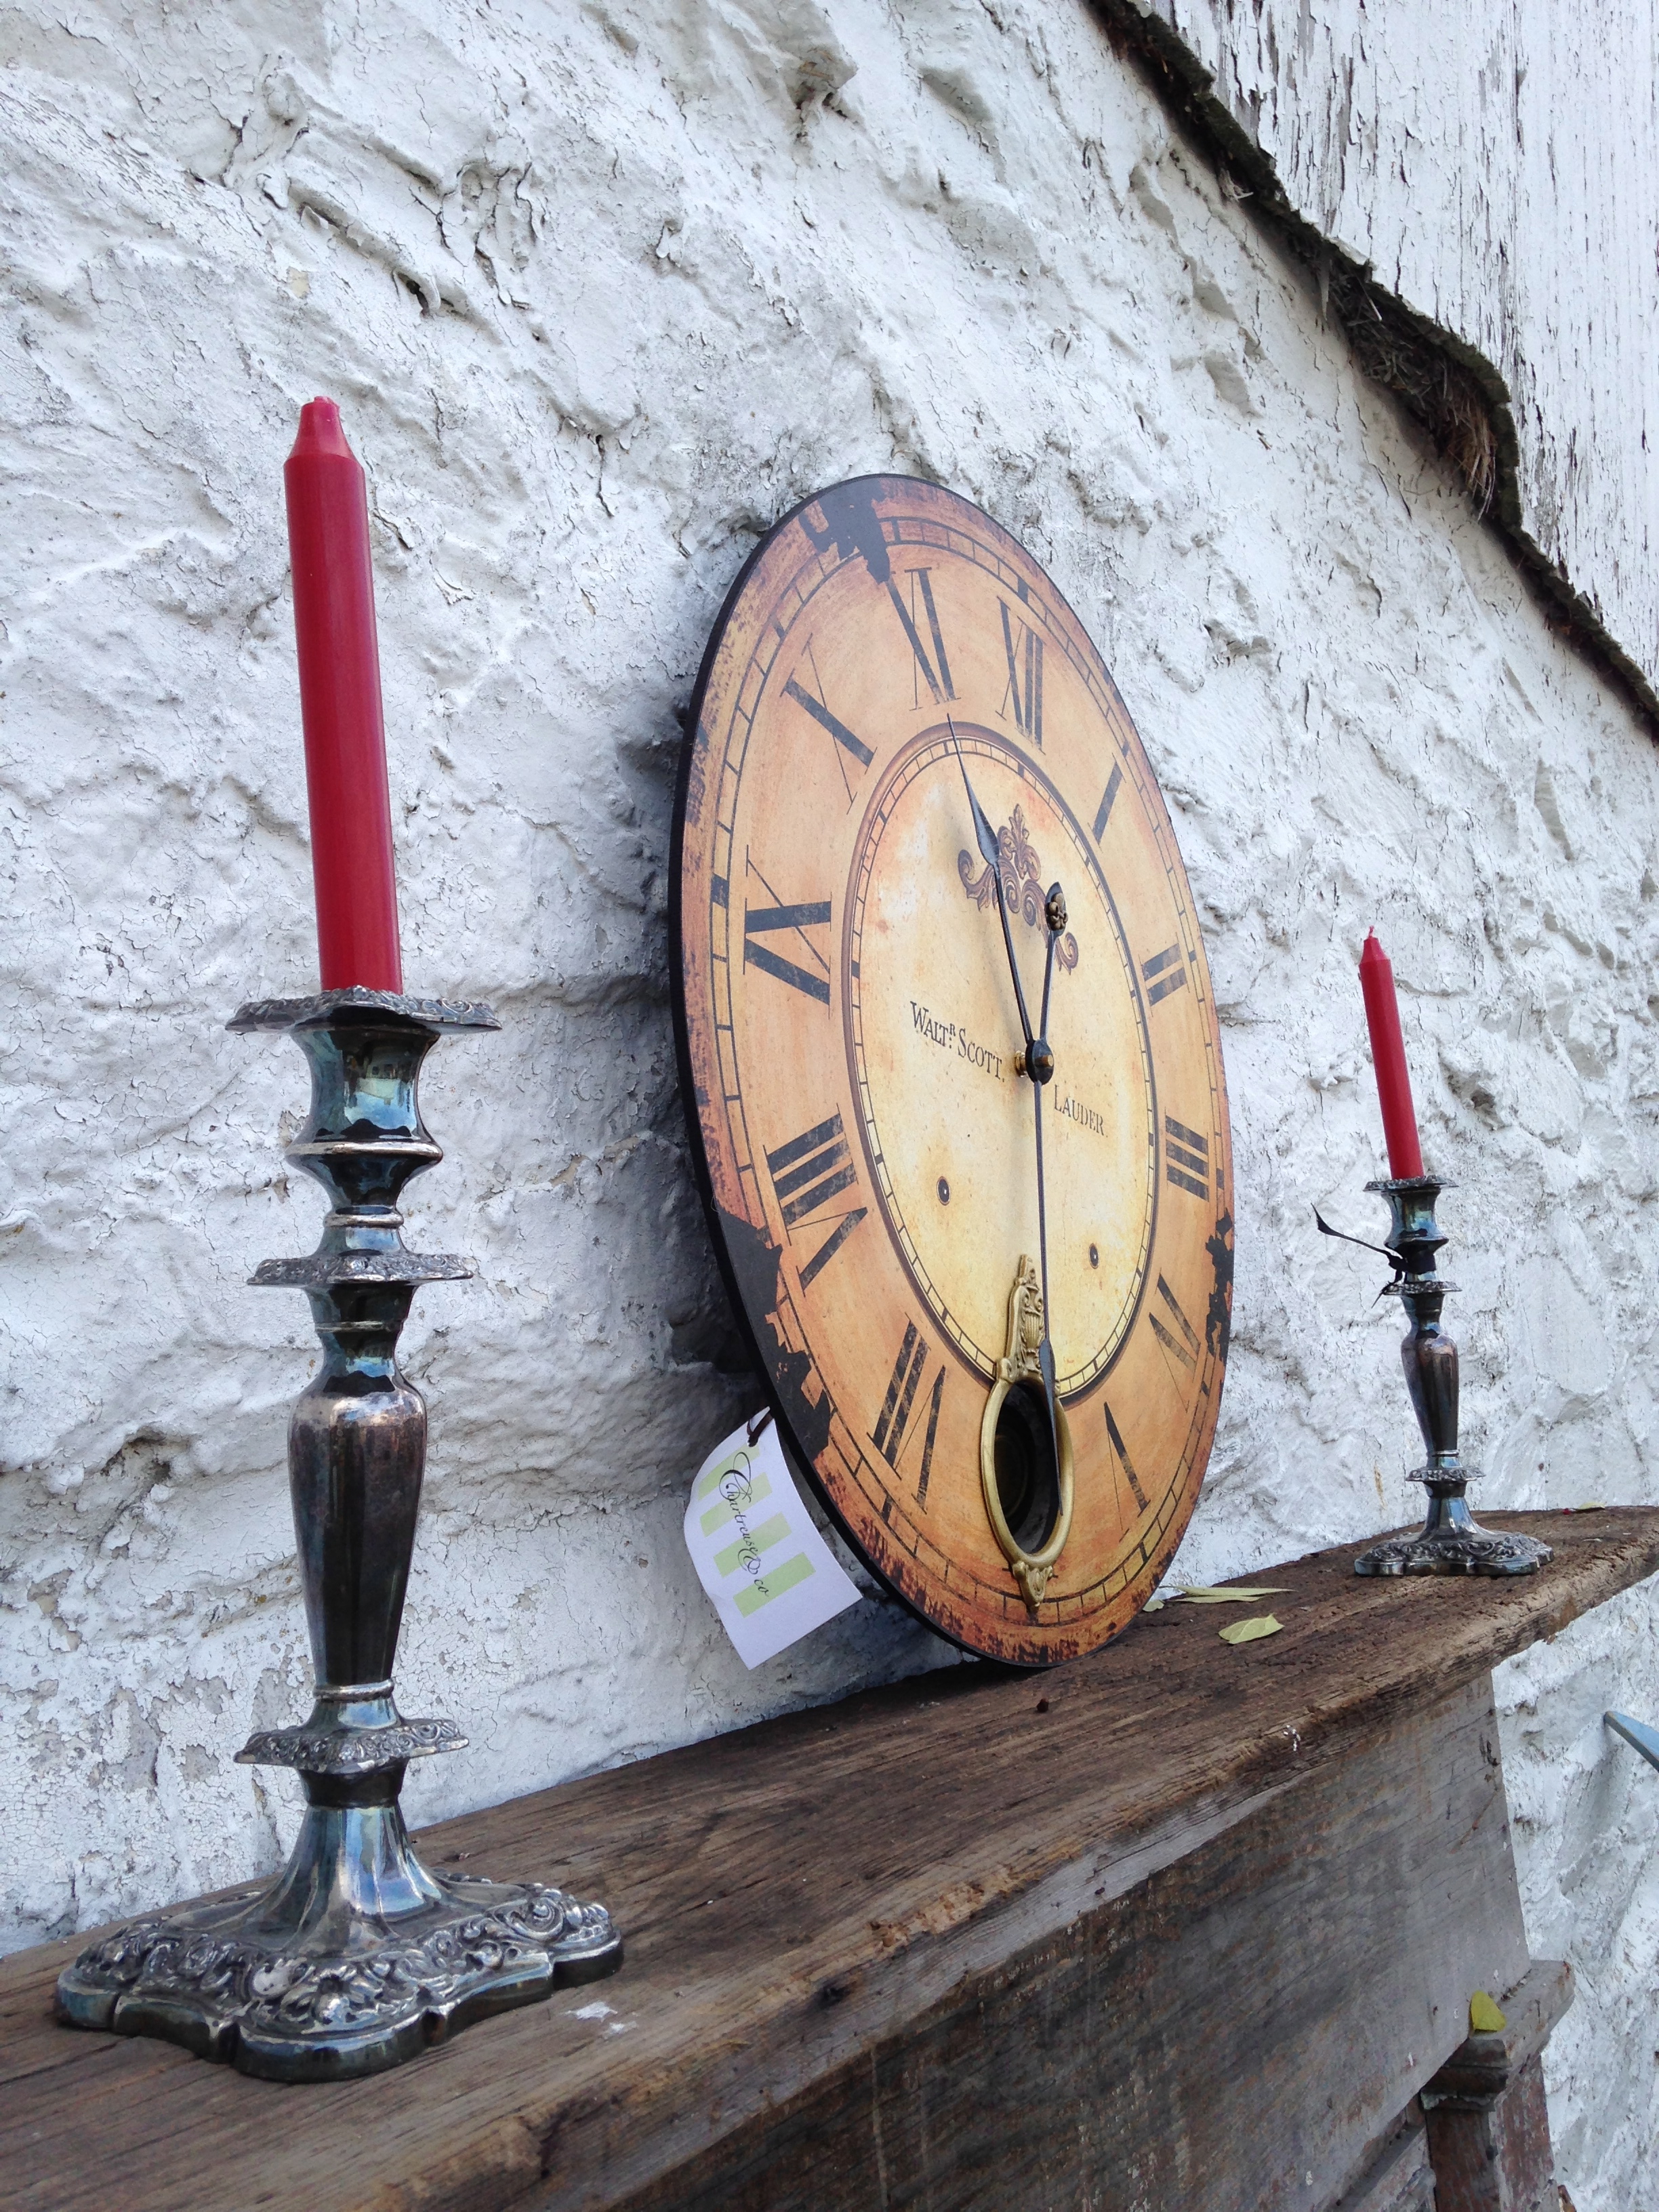
Let’s start with the most basic of mantle decorating designs:  candlesticks flanking a clock or mirror.  There is nothing wrong with this design.  Yet, take a look at it.  Does it really draw you in?  Does it turn your head or engage your interest?  Not really.

IMG_3551

Step 1:  Add greens.  A base of natural greens – found in your own yard or clipped from the Christmas tree – is best.

IMG_3592

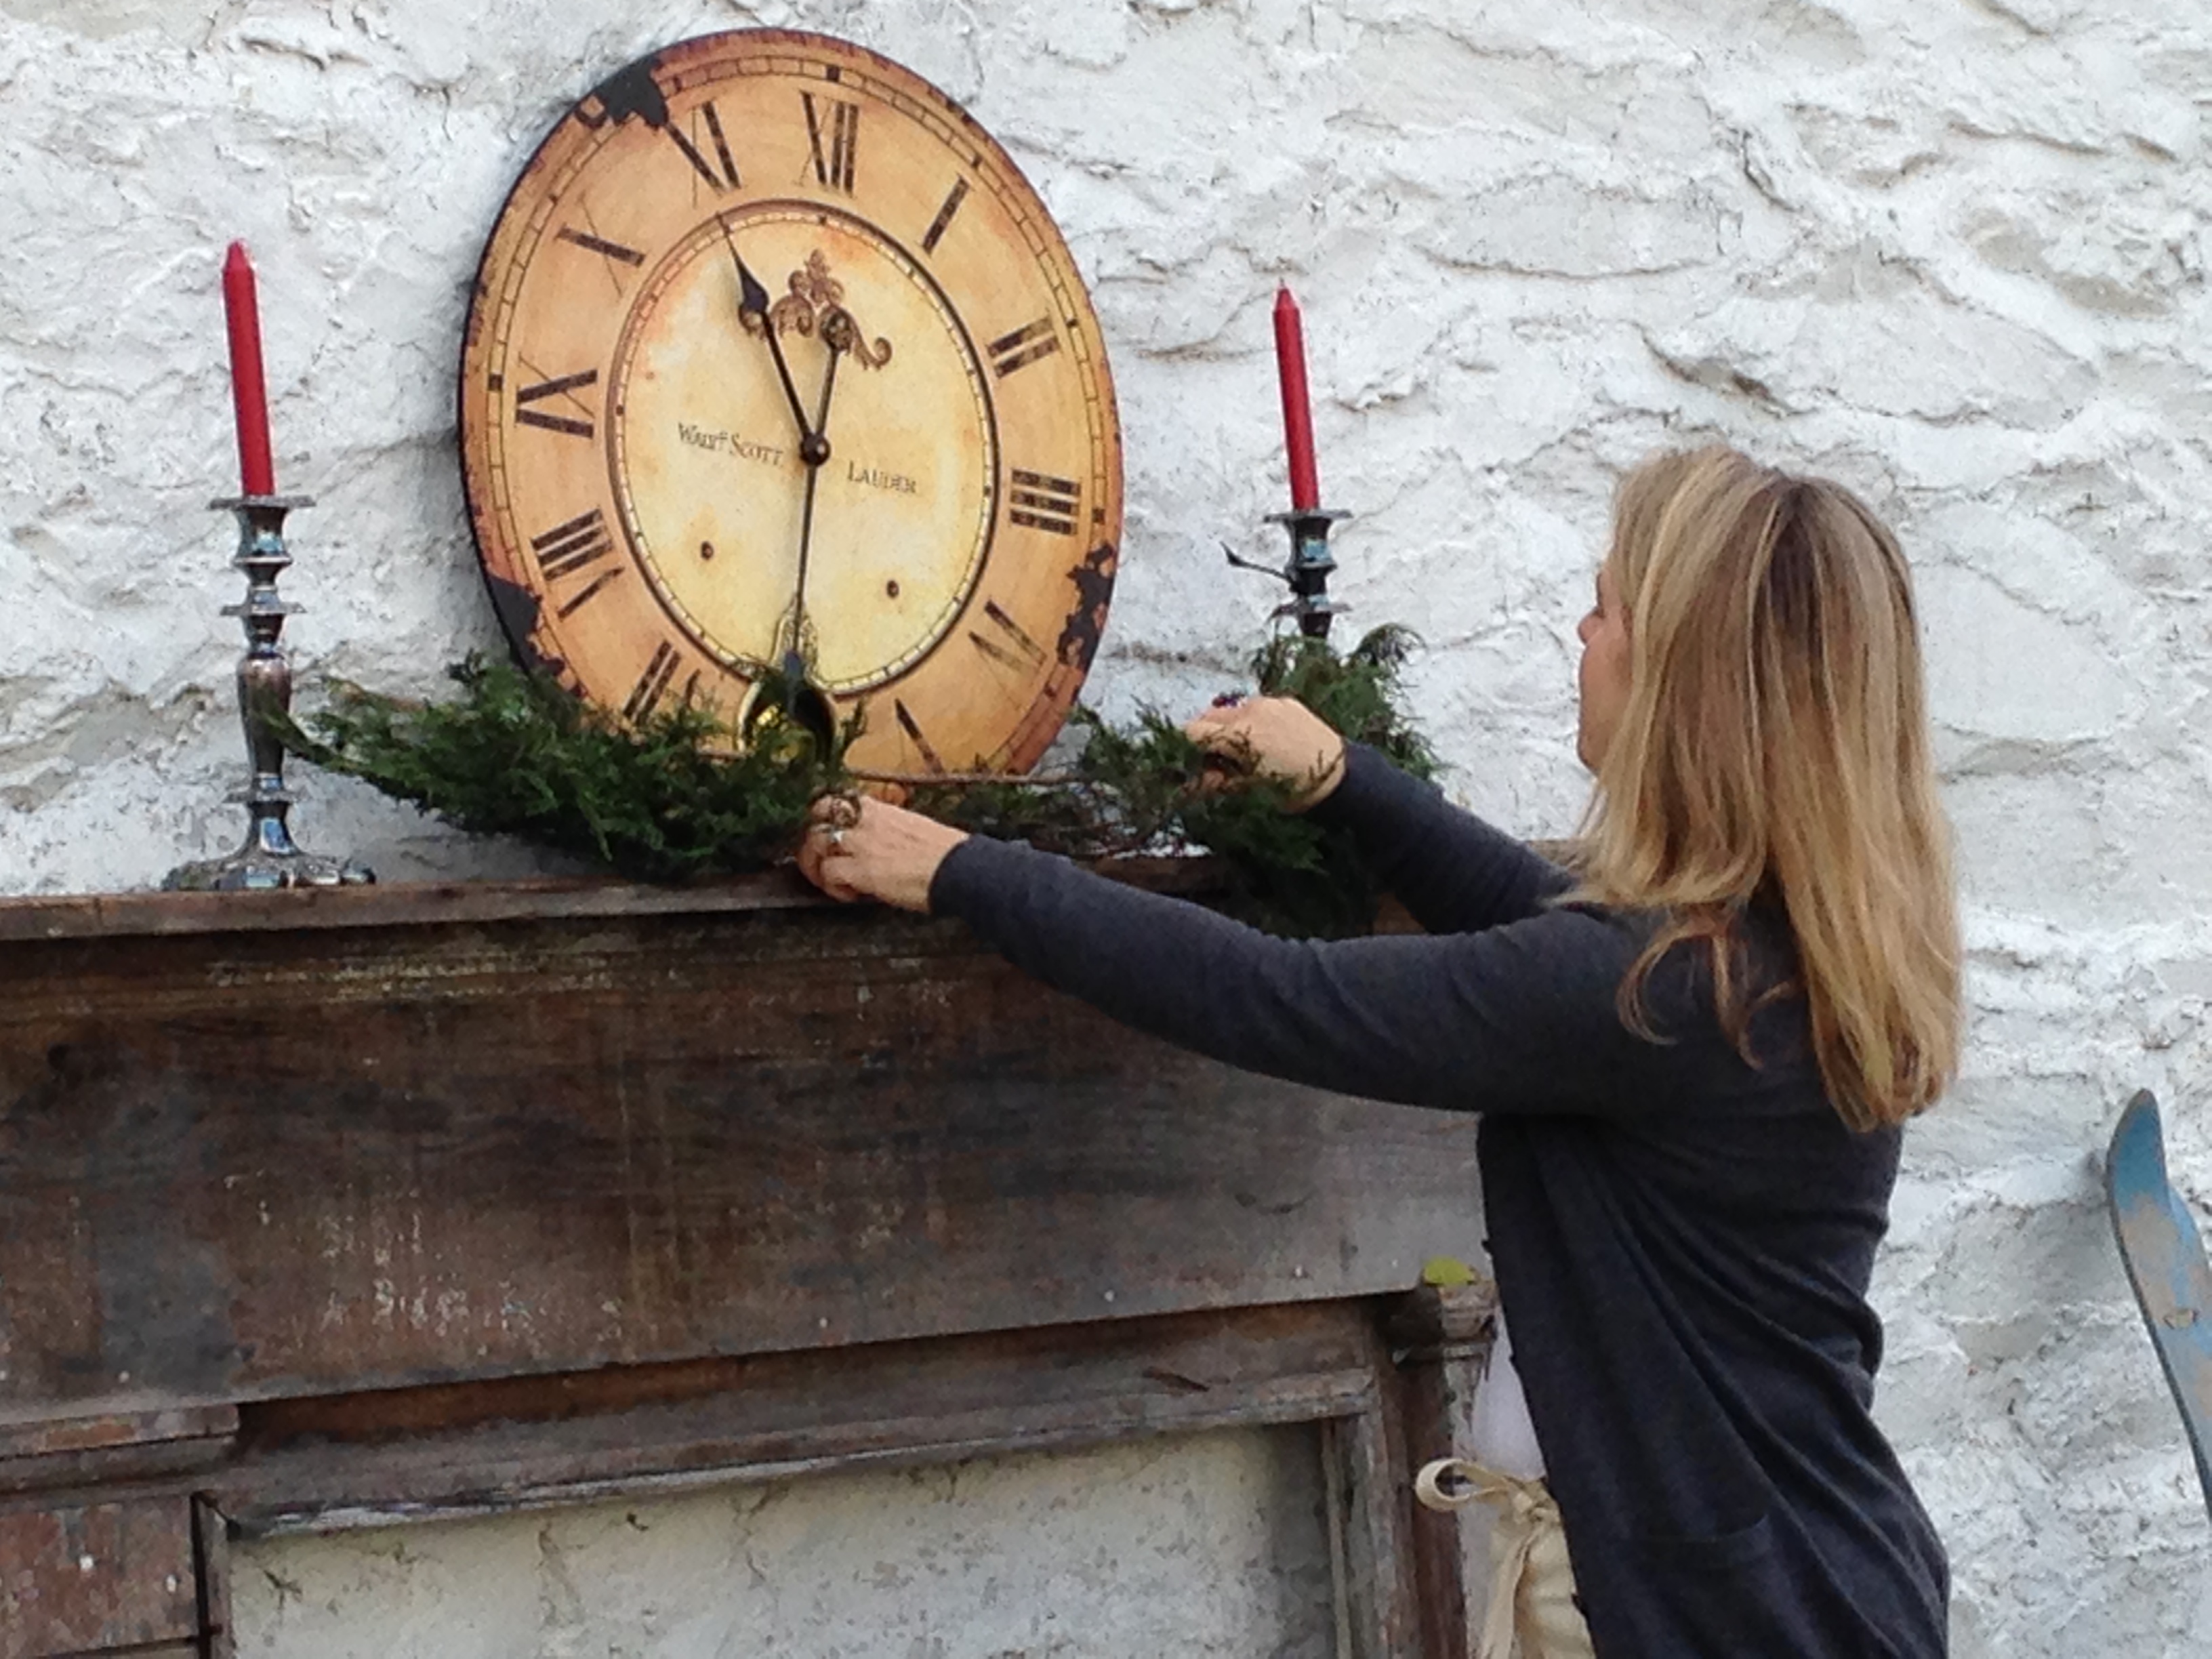
Step 2:  Create asymmetry.  Change the height of one of your candlesticks to add flow to the display.  Here I use books – my favorite decorating go-to for giving an element the height it needs.

IMG_3601

Go further with the asymmetrical design by moving the candlesticks together, and pulling the clock to an off-center position.

It’s getting better, isn’t it?

IMG_3609

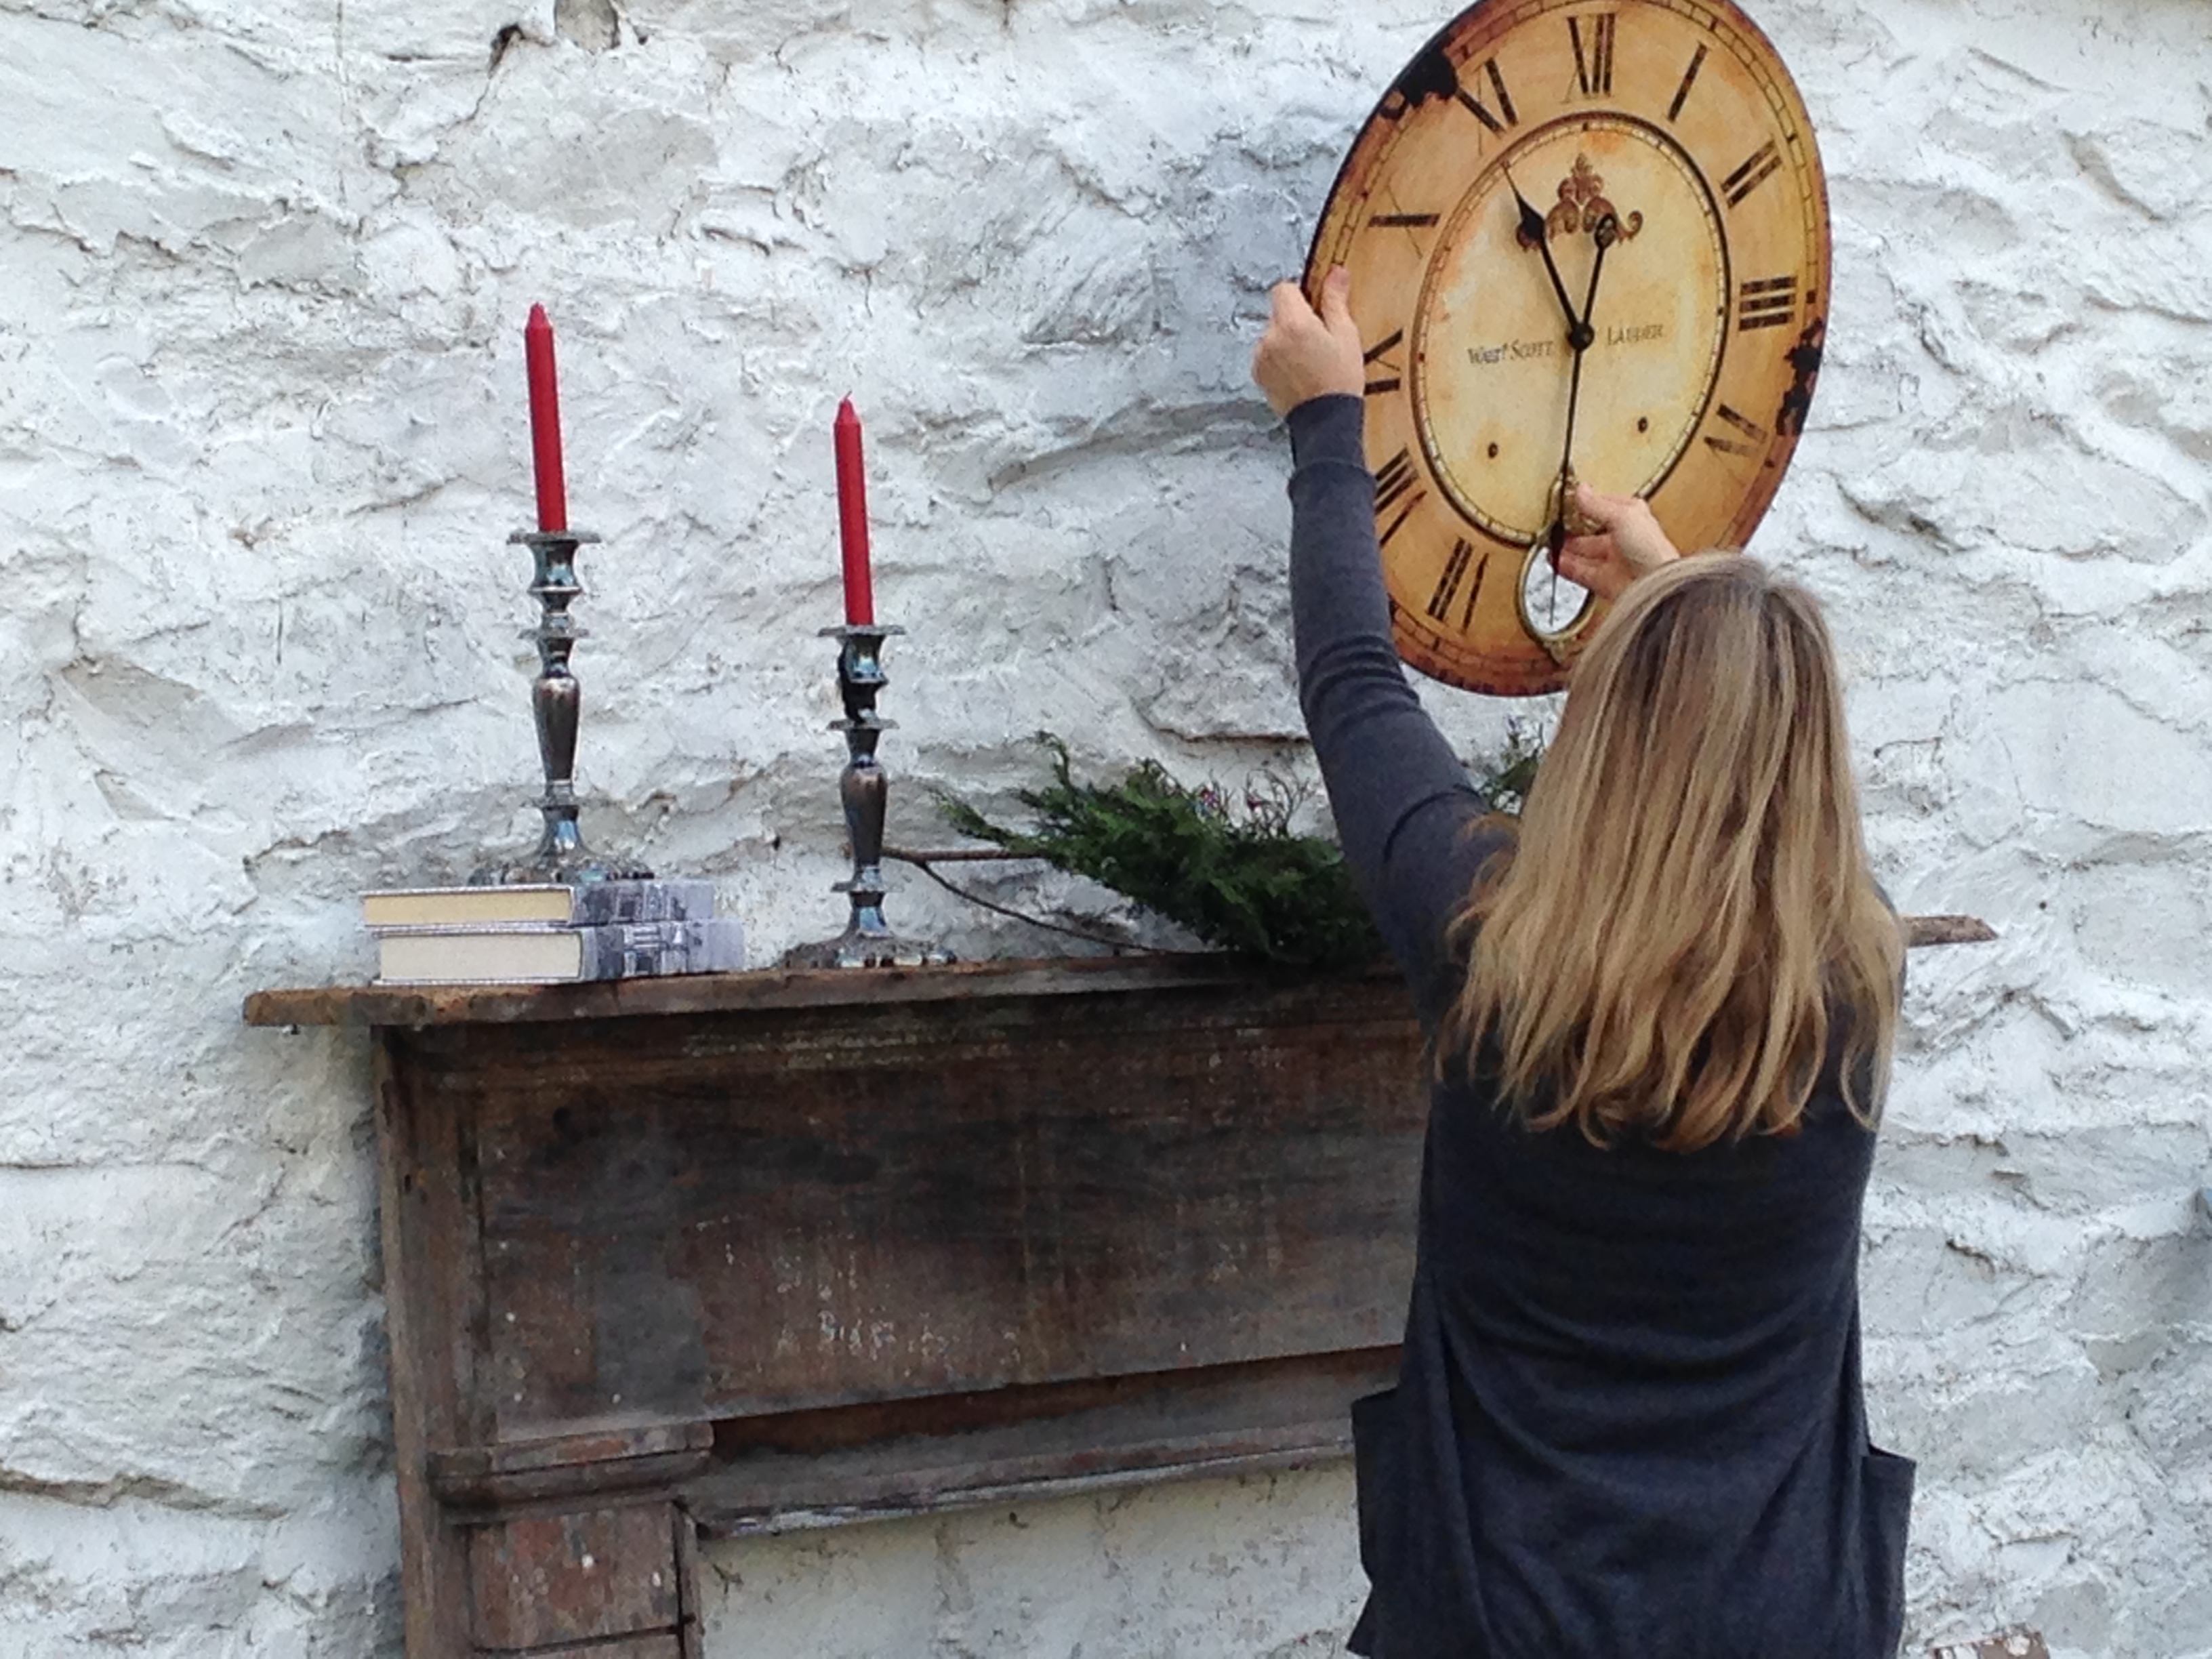
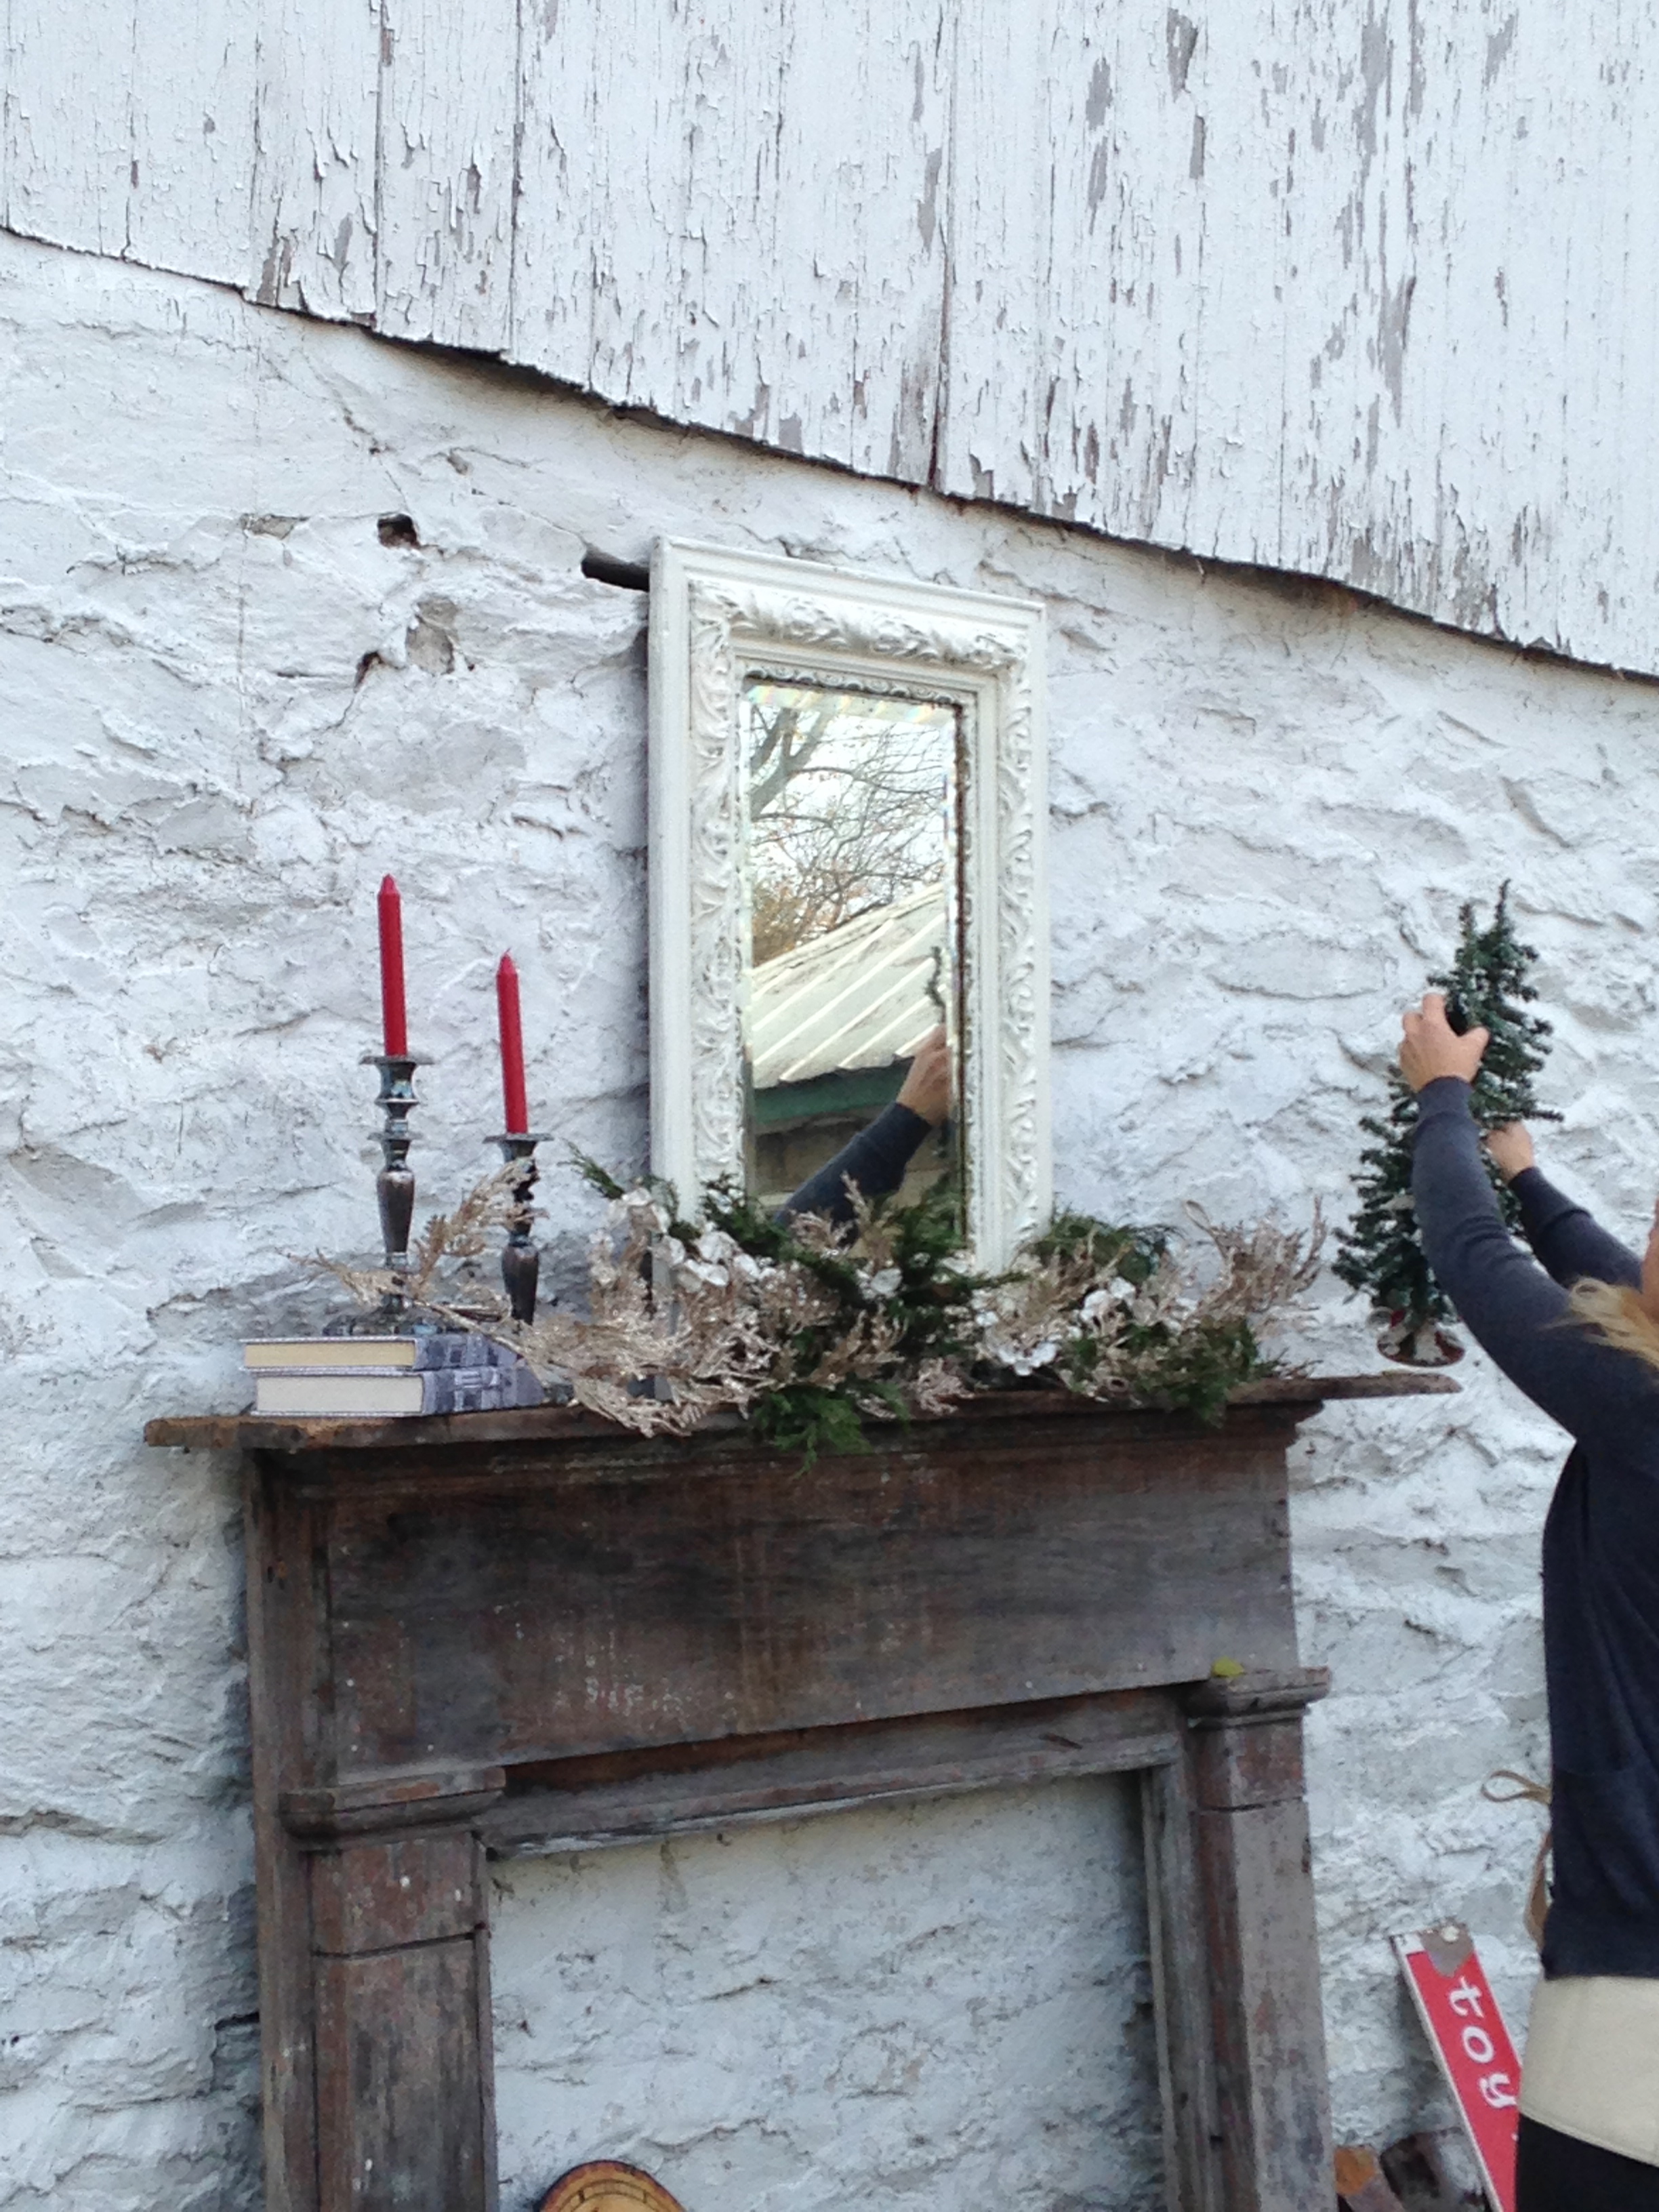
Step 3:  Employ vertical elements.  I’m removing the round clock so that I can add some additional height.

IMG_3612

I’ve found just the thing in this vertically hung, vintage mirror.  Mirrors have the added benefit of their reflective nature and room-opening power.

IMG_3618

Step 4:  Intertwine layers of garland.  Intertwining the wired, glittered garland with the natural greens gives shape and interest.  When using store-bought greens, always work with them to give them the lively shape that you want them to have.  Never leave them flat as they come from the store.

Here, interweaving them with the natural greens gives liveliness to the display.

IMG_3633

Note how this base of greenery has tied the major, vertical elements together.

IMG_3648

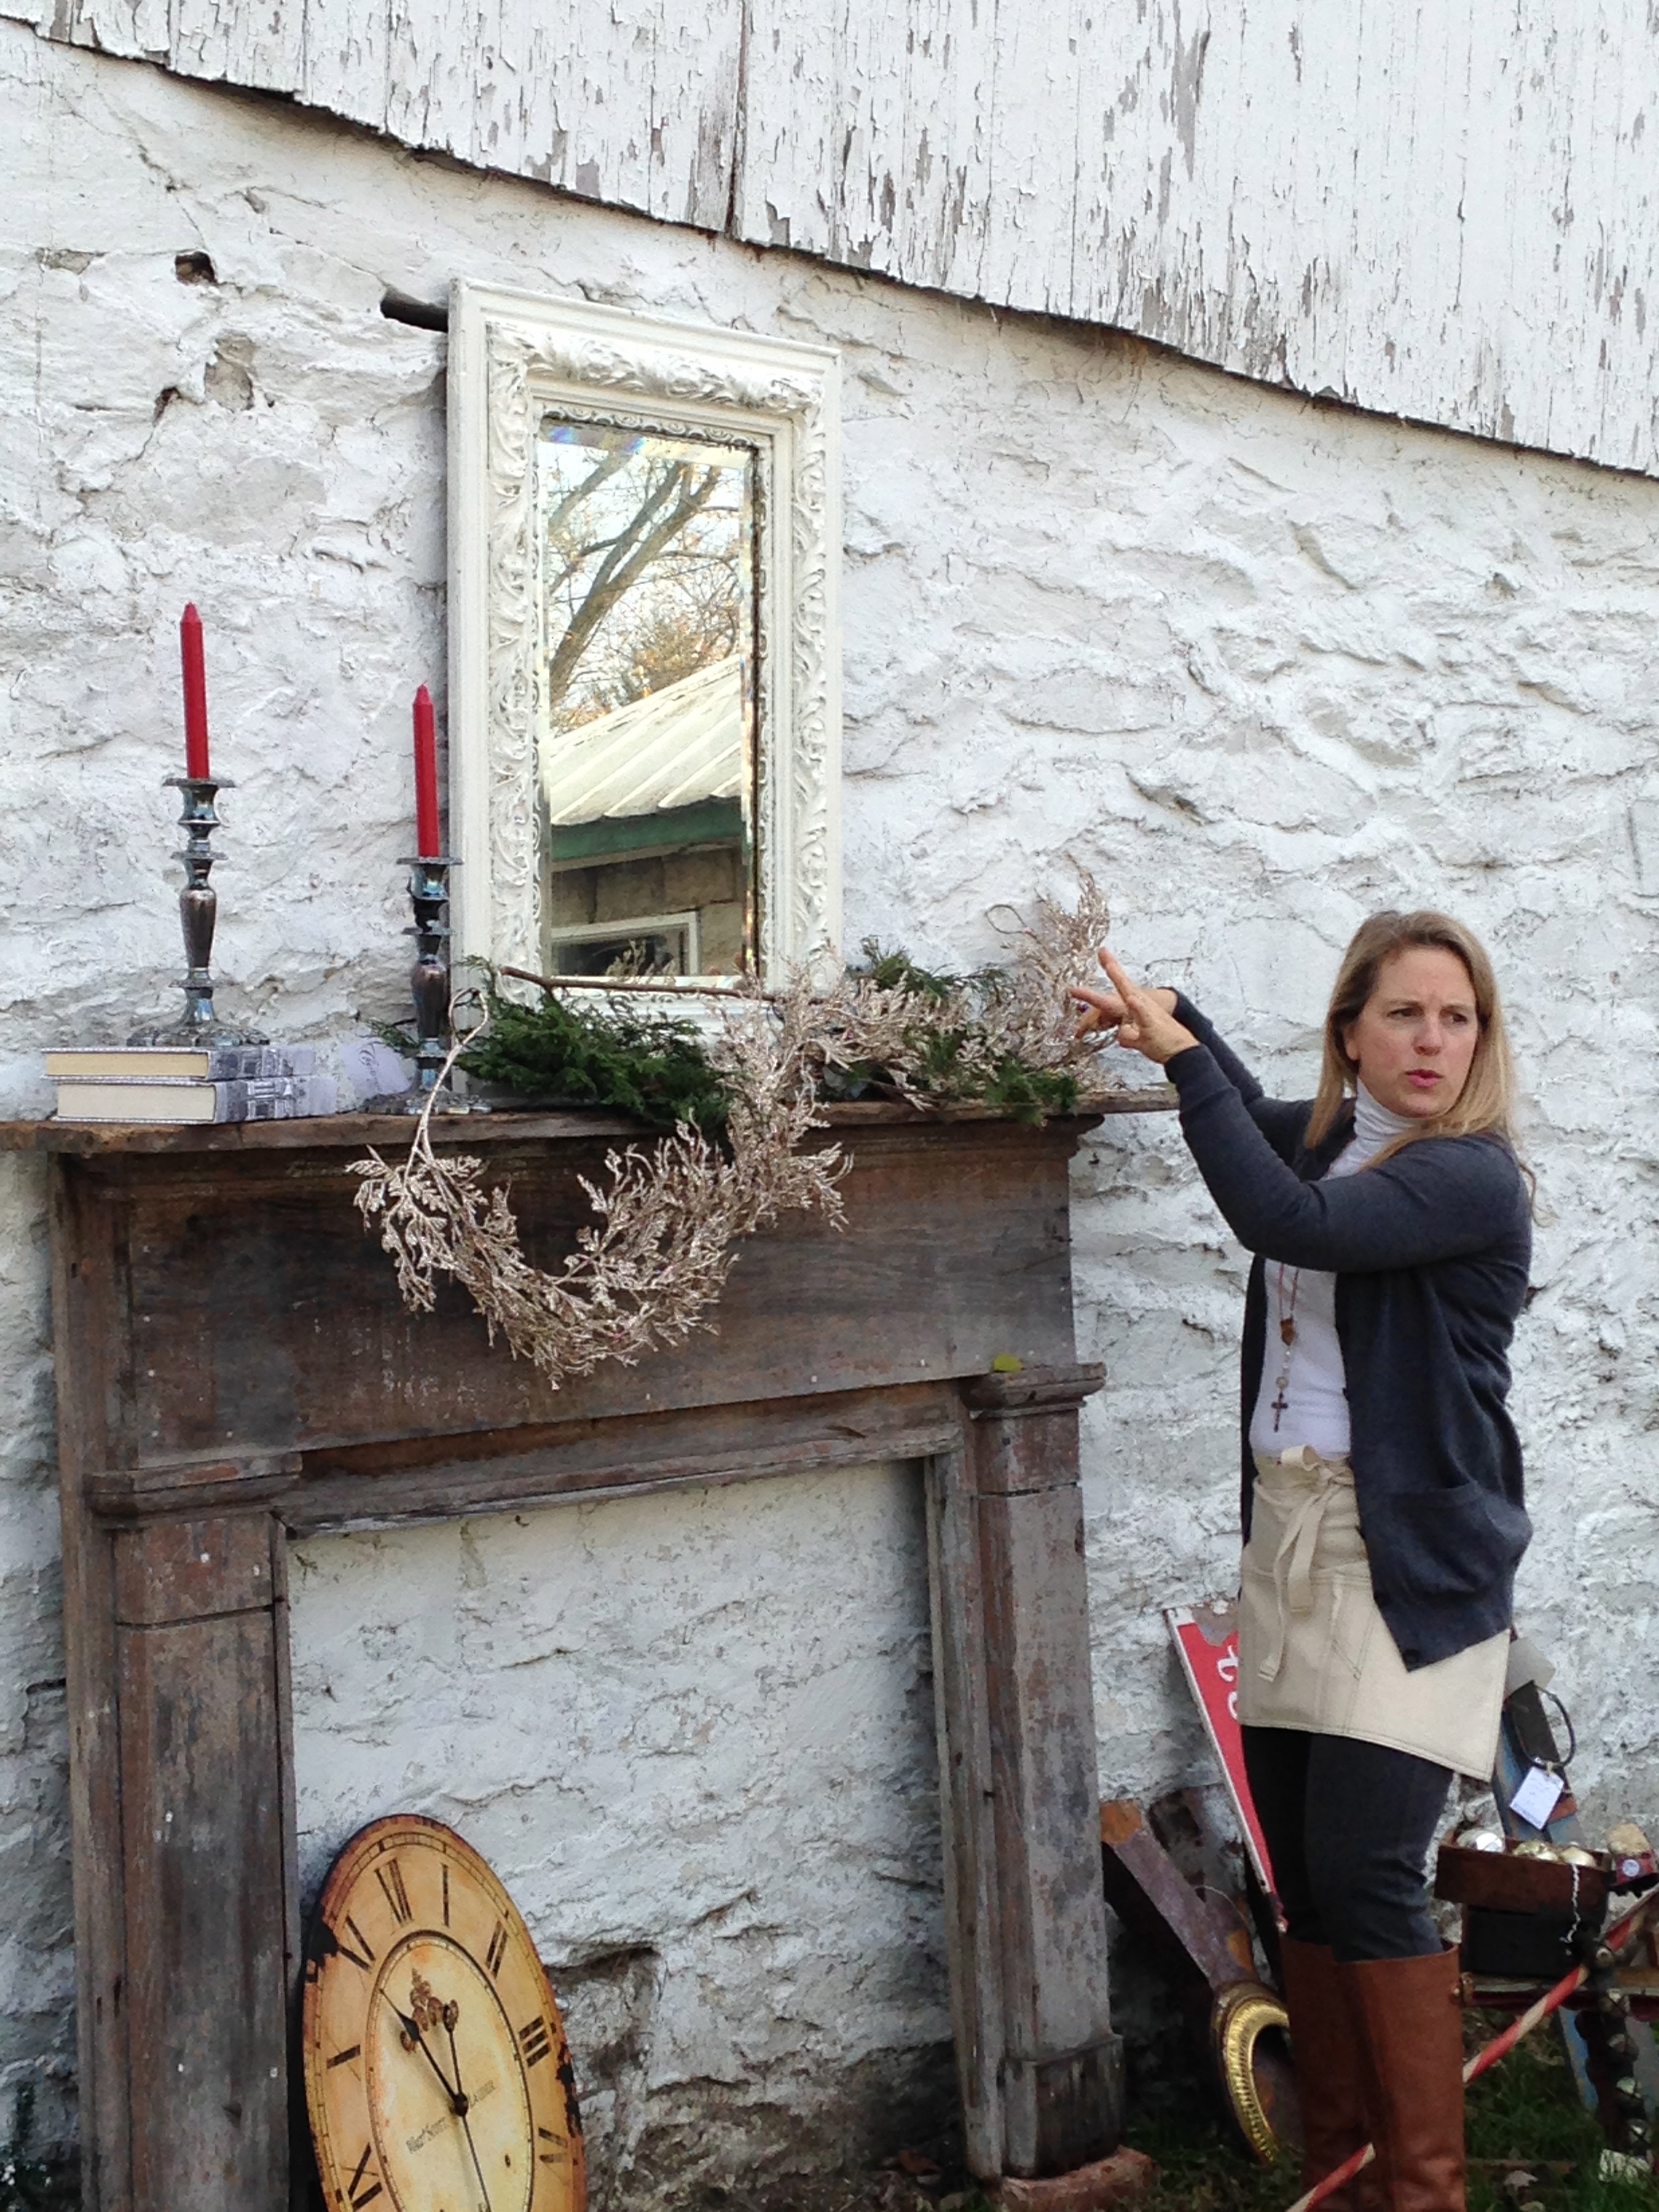
Step 5:  Add texture.  These paper garlands add whimsy and texture.

IMG_3650

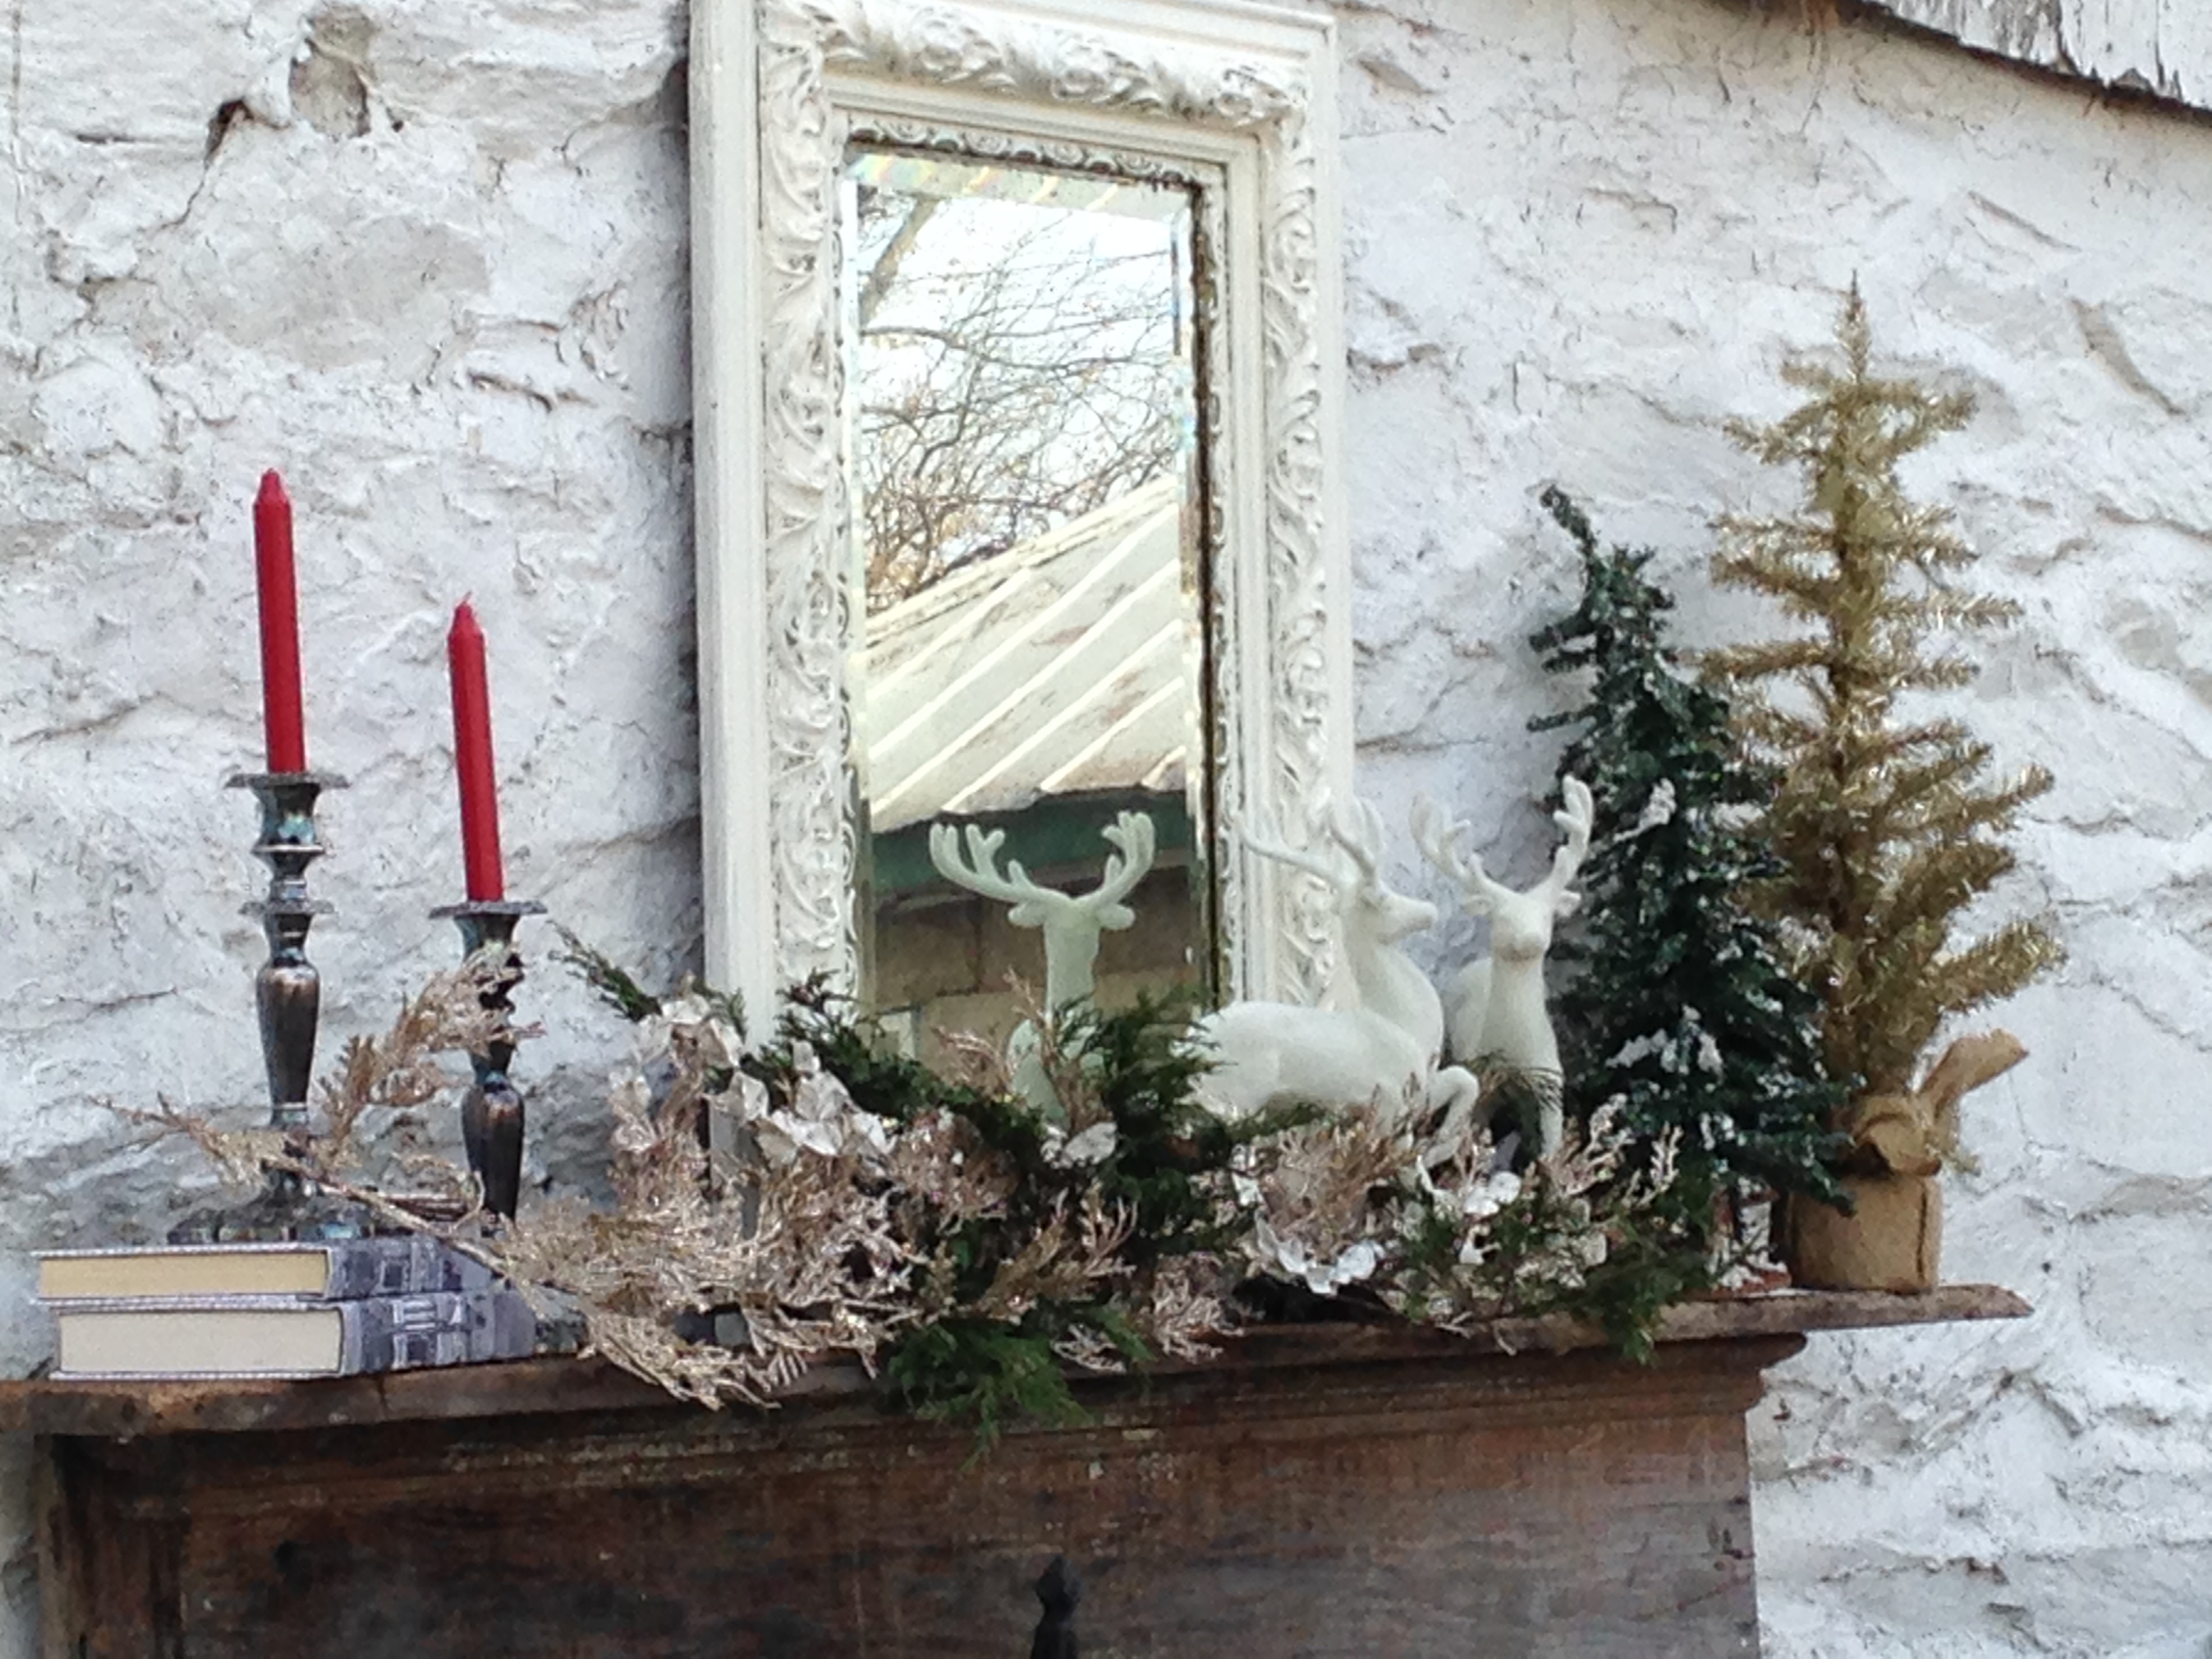
Step 6:  Include a theme.  They mantle already looks great, but we can take it to the next level with a theme – in this case I’m doing Woodland.

IMG_3655

Step 7:  (Woodland theme)  I’ve added both a natural and a tinsel tree, combining the glittery with the earthy, as we’ve done with the garland base.

IMG_3668

Step 8:  Add figures.  These felted deer provide a sculptural element, and serve the design function of linking the white, carved frame to the trees and garland below.

IMG_3681

Step 9:  Maintain visual balance.  The ‘weight’ of the deer needs to be balanced on the opposite side.  In this case 2 large pine cones – one natural and one dusted with German glass glitter – work perfectly.

IMG_3683

Step 10:  Tuck ornaments and tiny items amongst the greenery.  Small owl and squirrel ornaments complete the Woodland theme, as they add that extra level of interest – that little something you see as you come nearer to the mantle.

Compare this photo to the first one.  Quite a difference.  And we had so much fun doing it!

IMG_3690

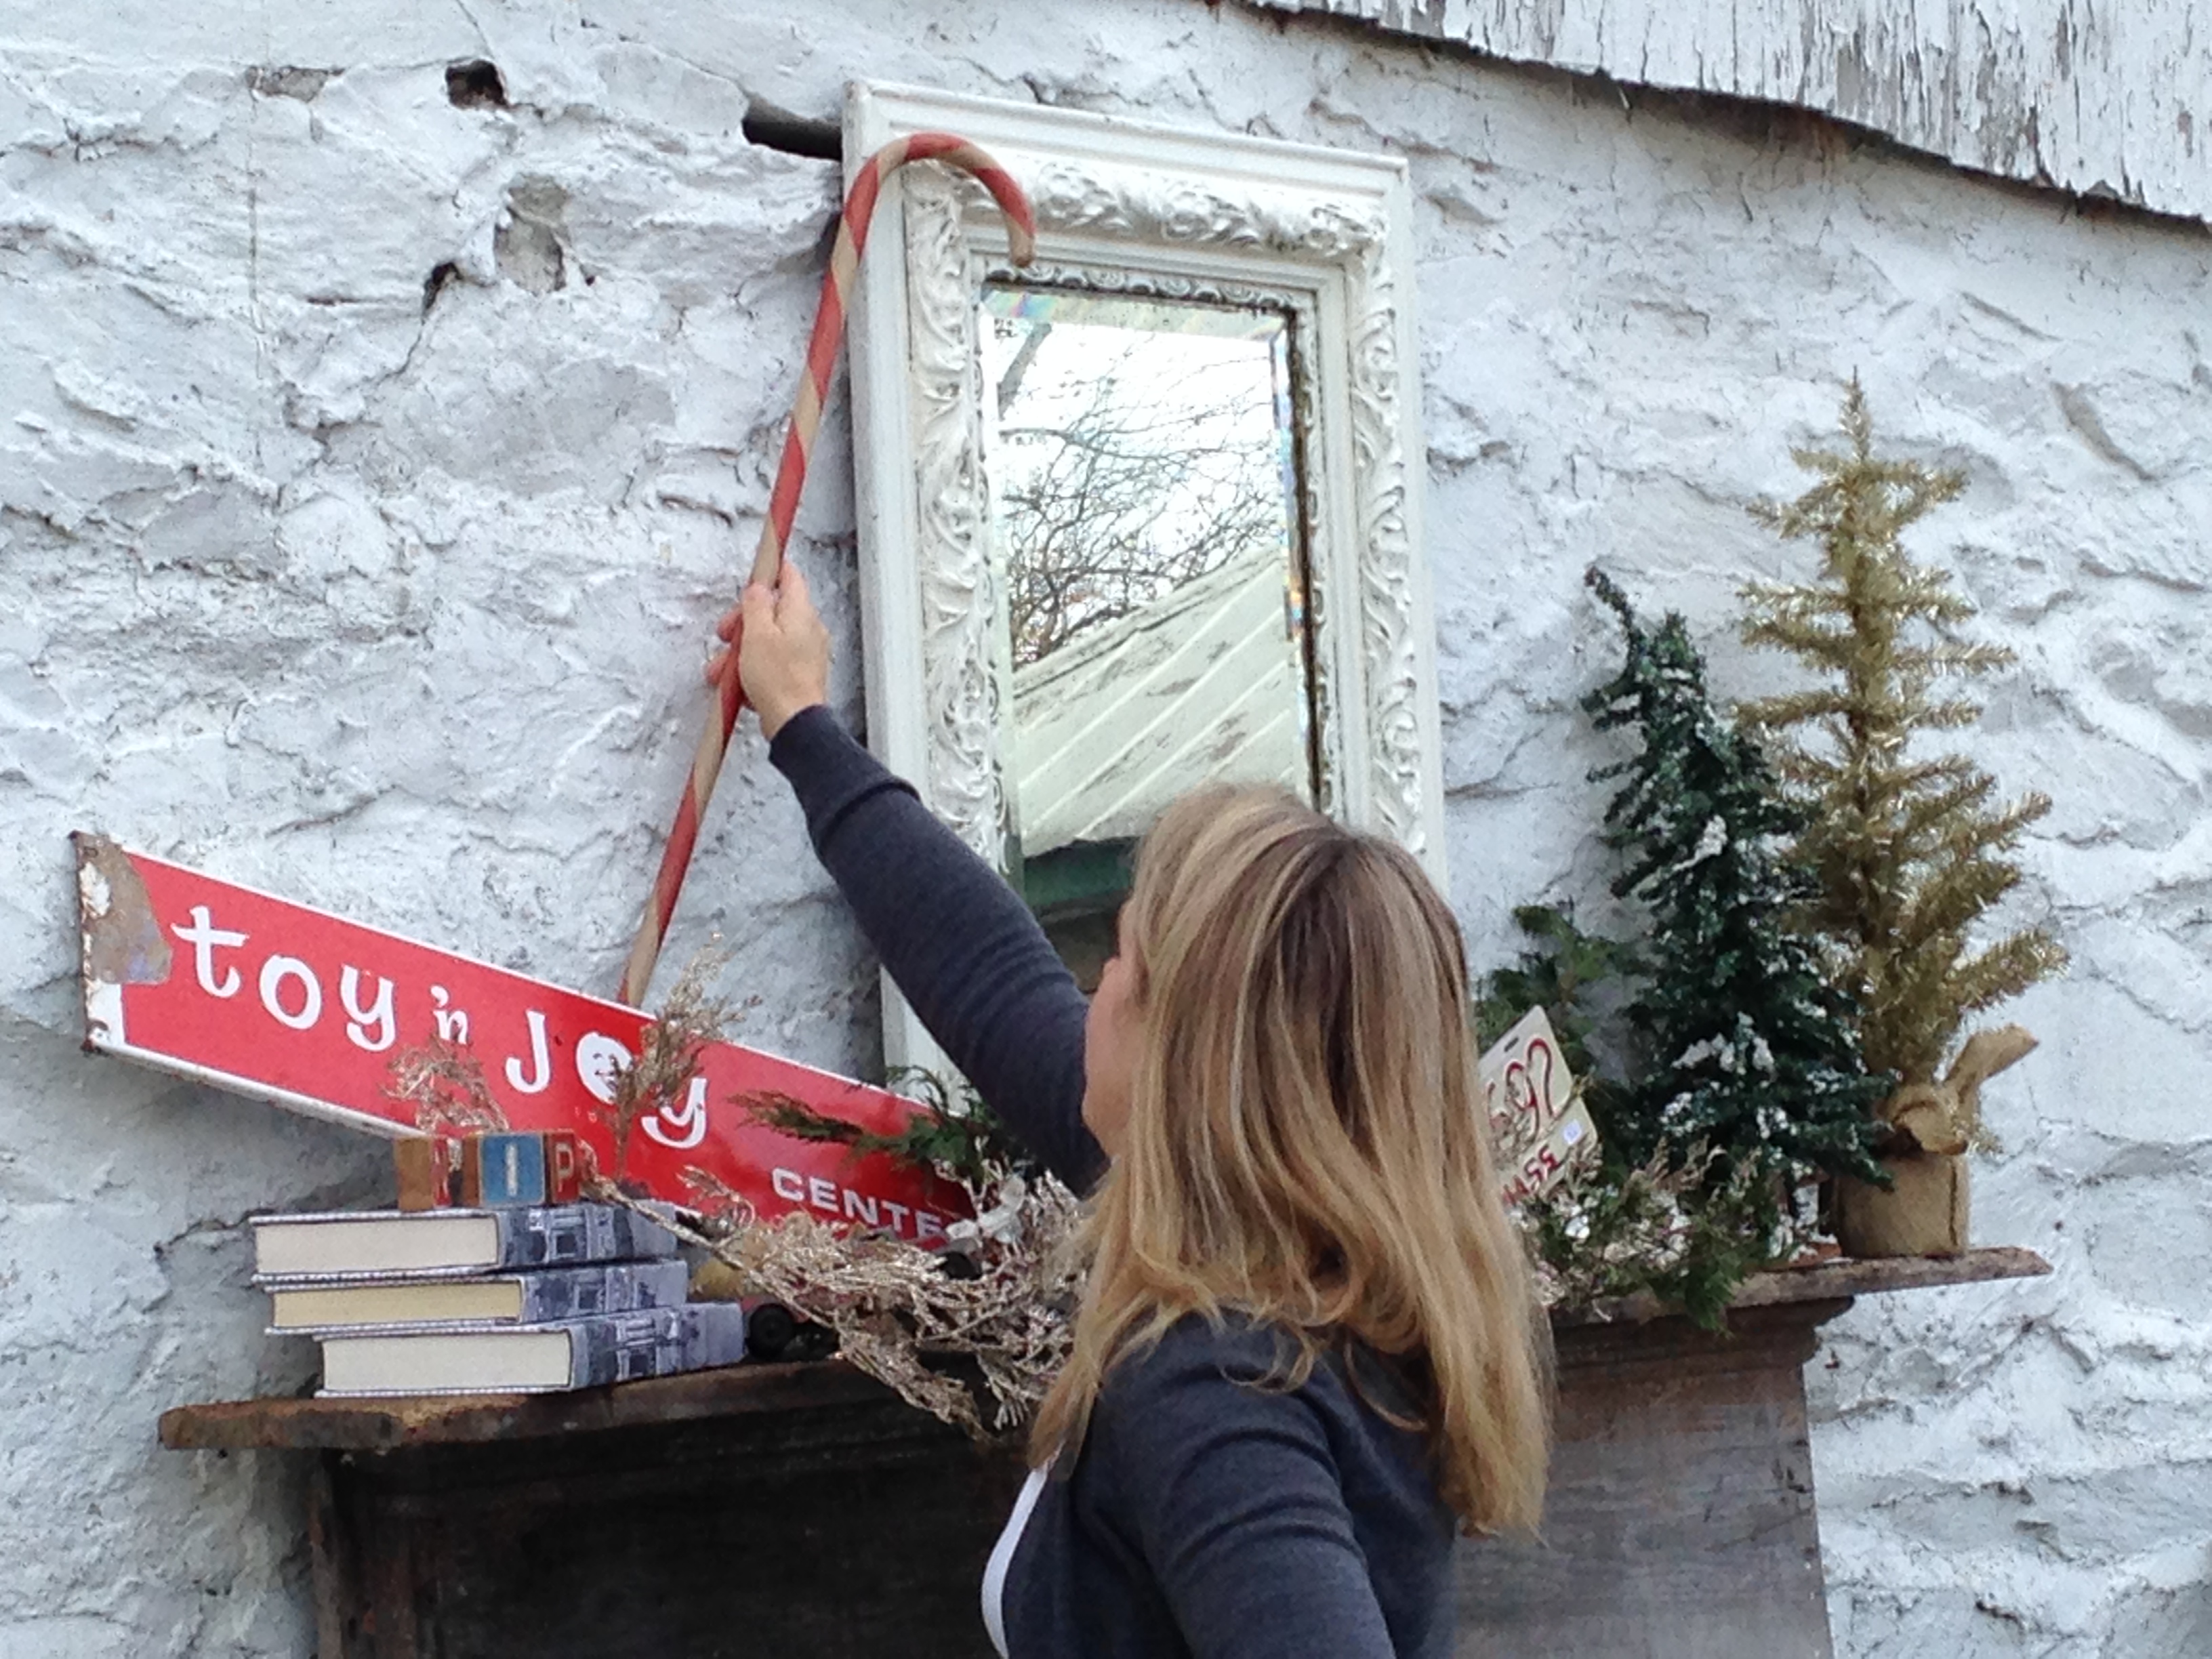
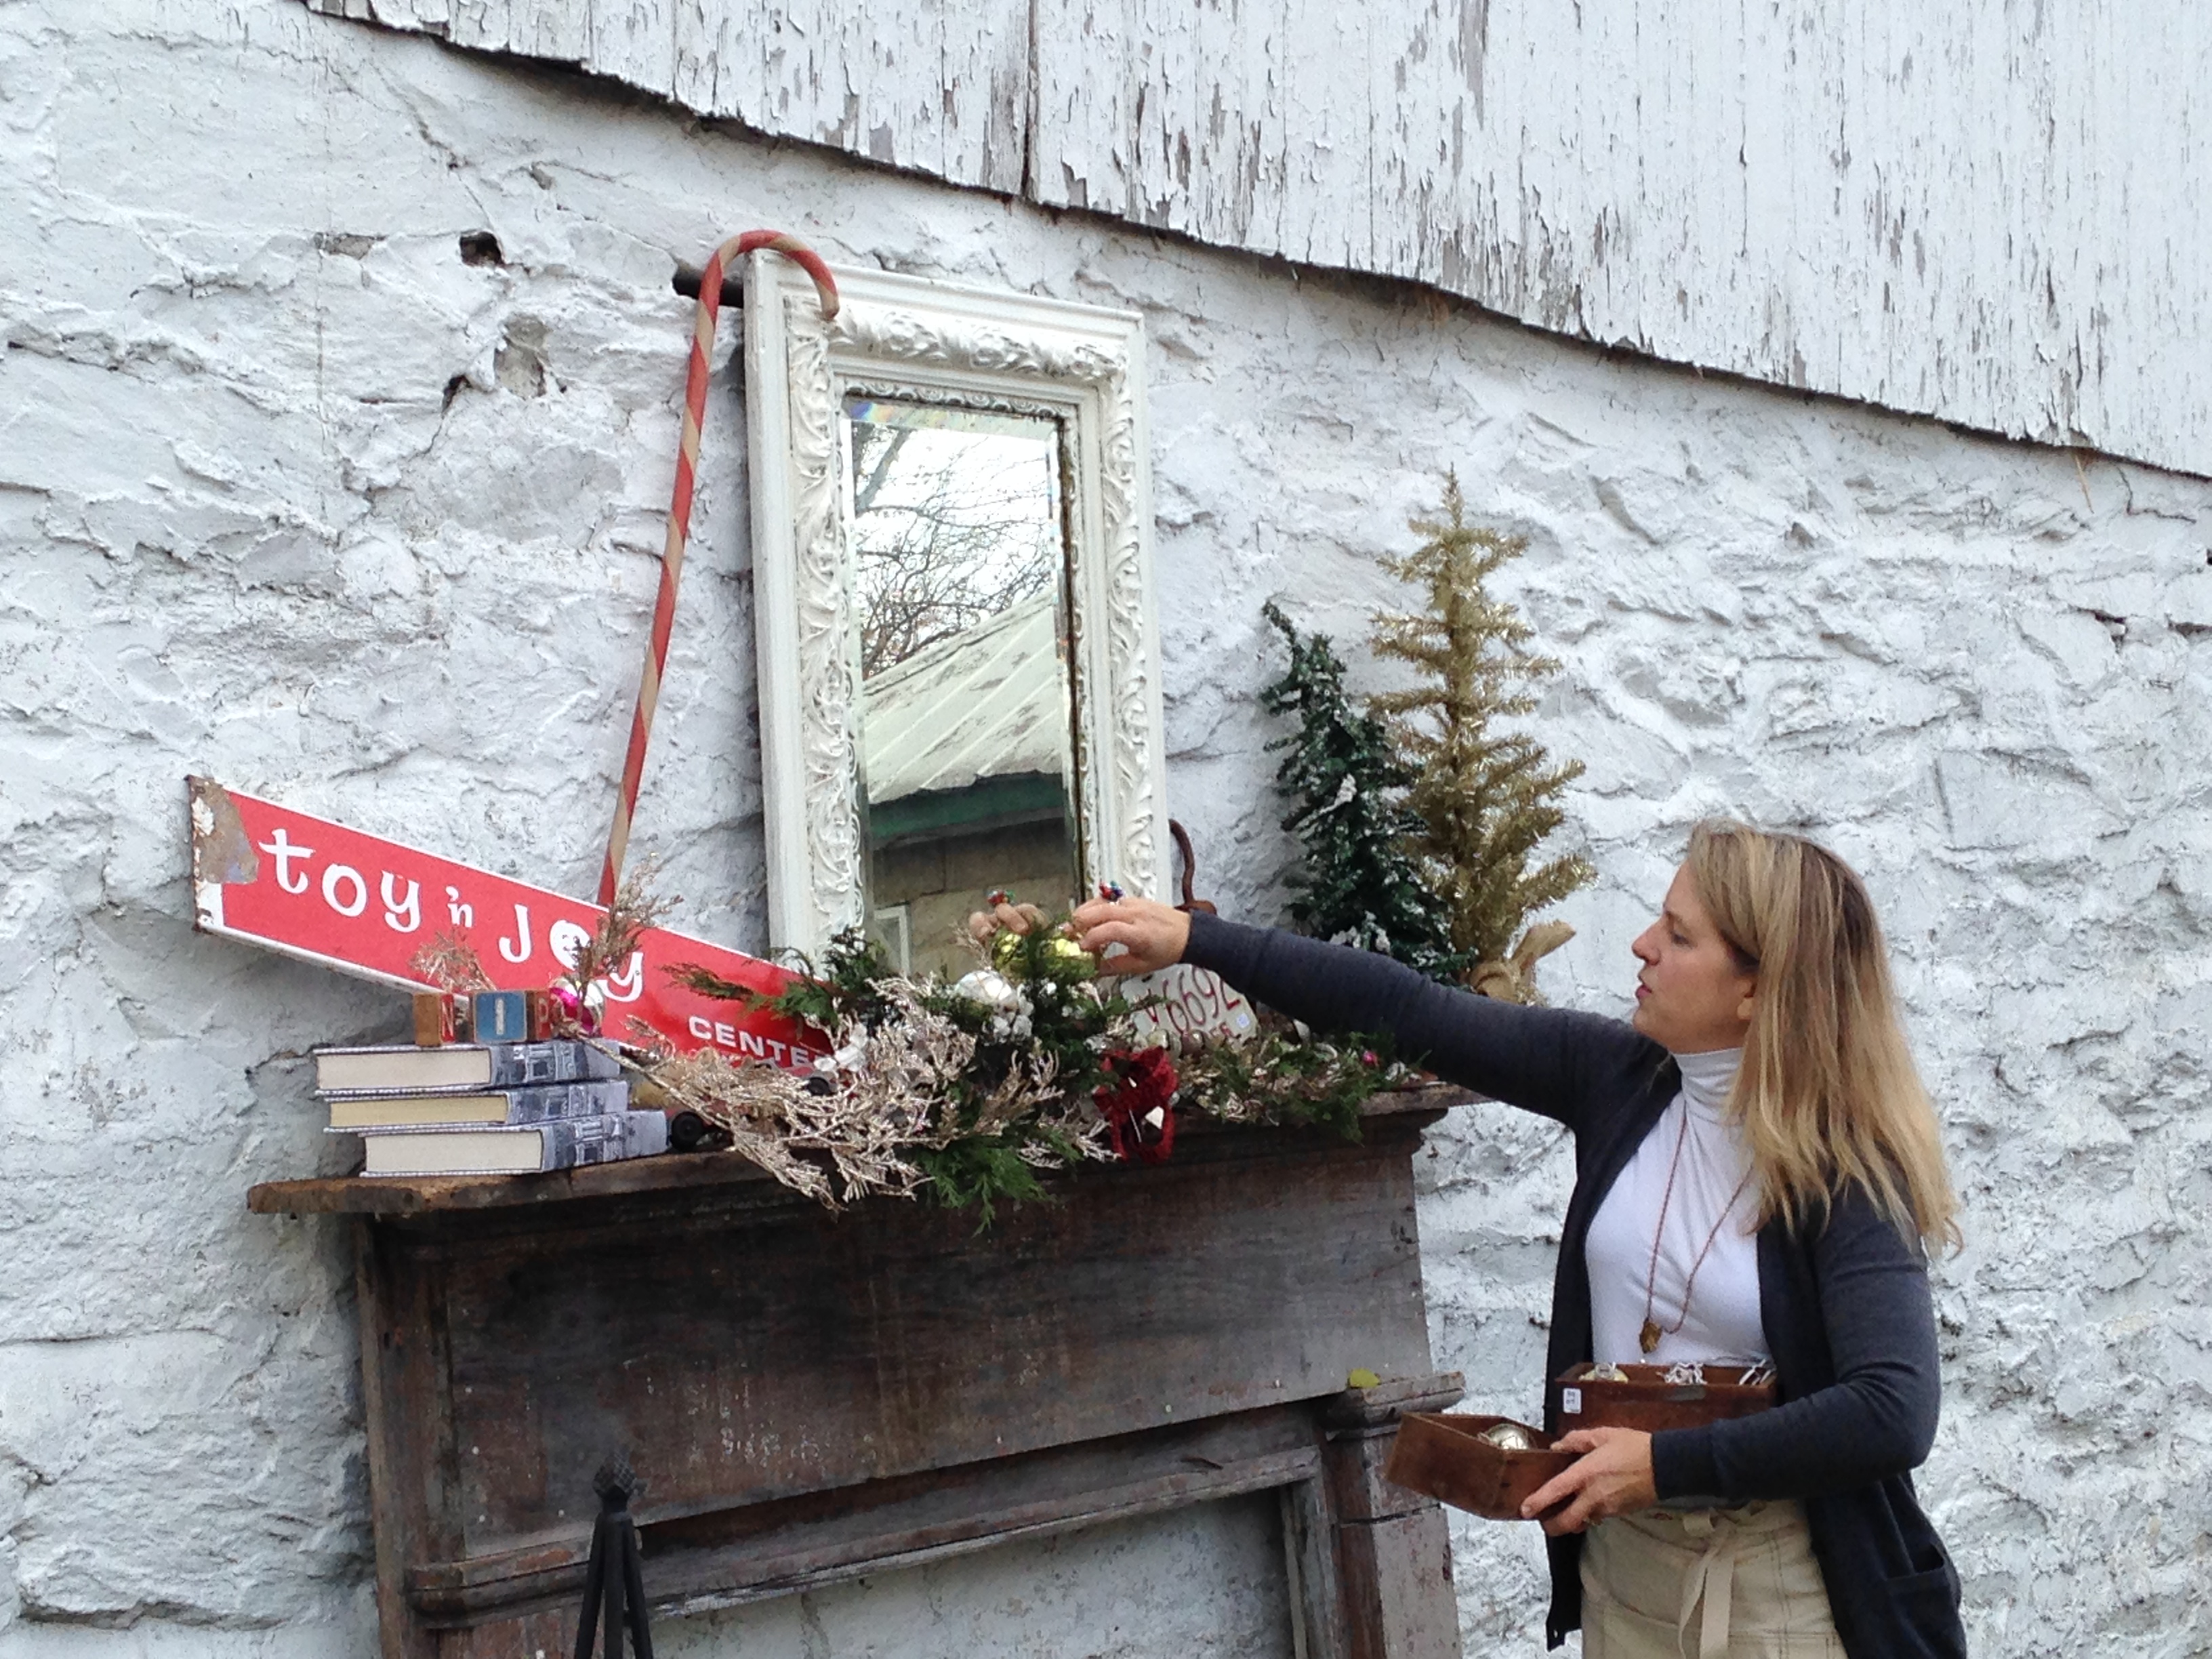
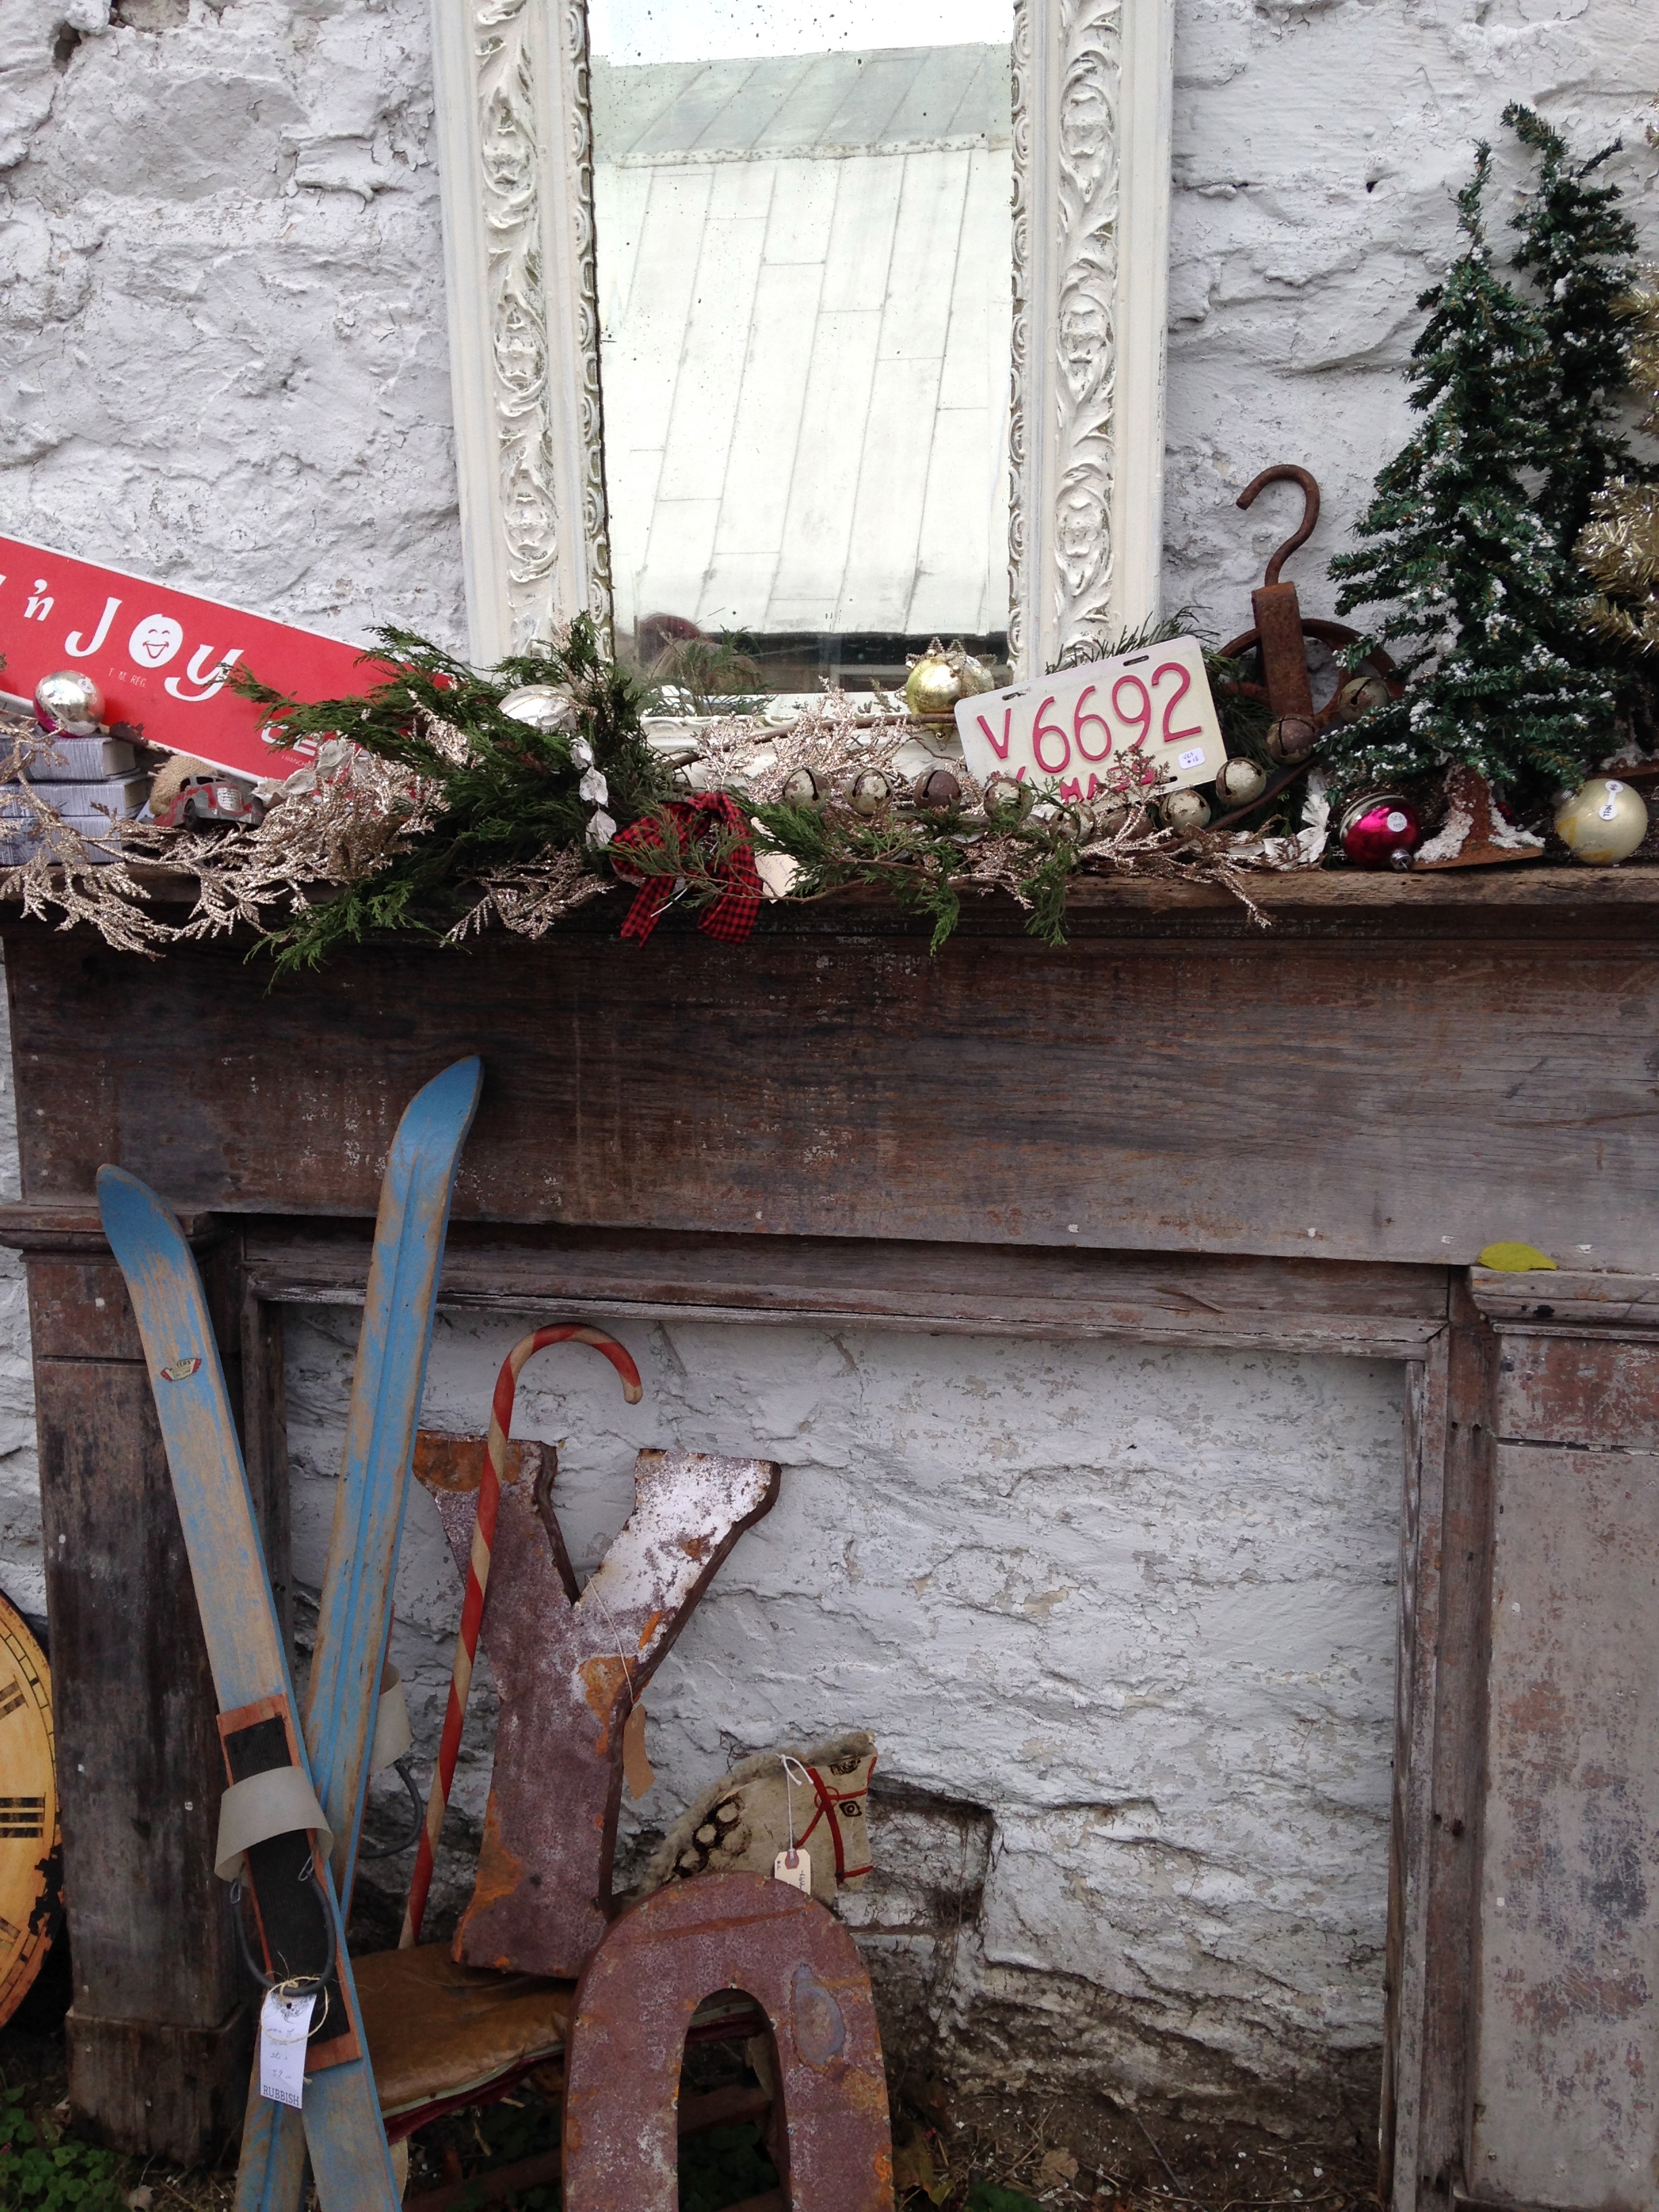
Step 6:  (Vintage Toyland theme) Let’s remove the formal candlesticks (which provided that shot of red for the Woodland theme) in favor of a vintage toy store sign.

IMG_3717

While the elements are completely different (silver candlesticks vs. graphic sign), design-wise they serve the same purpose, which is to balance the trees and mirror.

IMG_3721

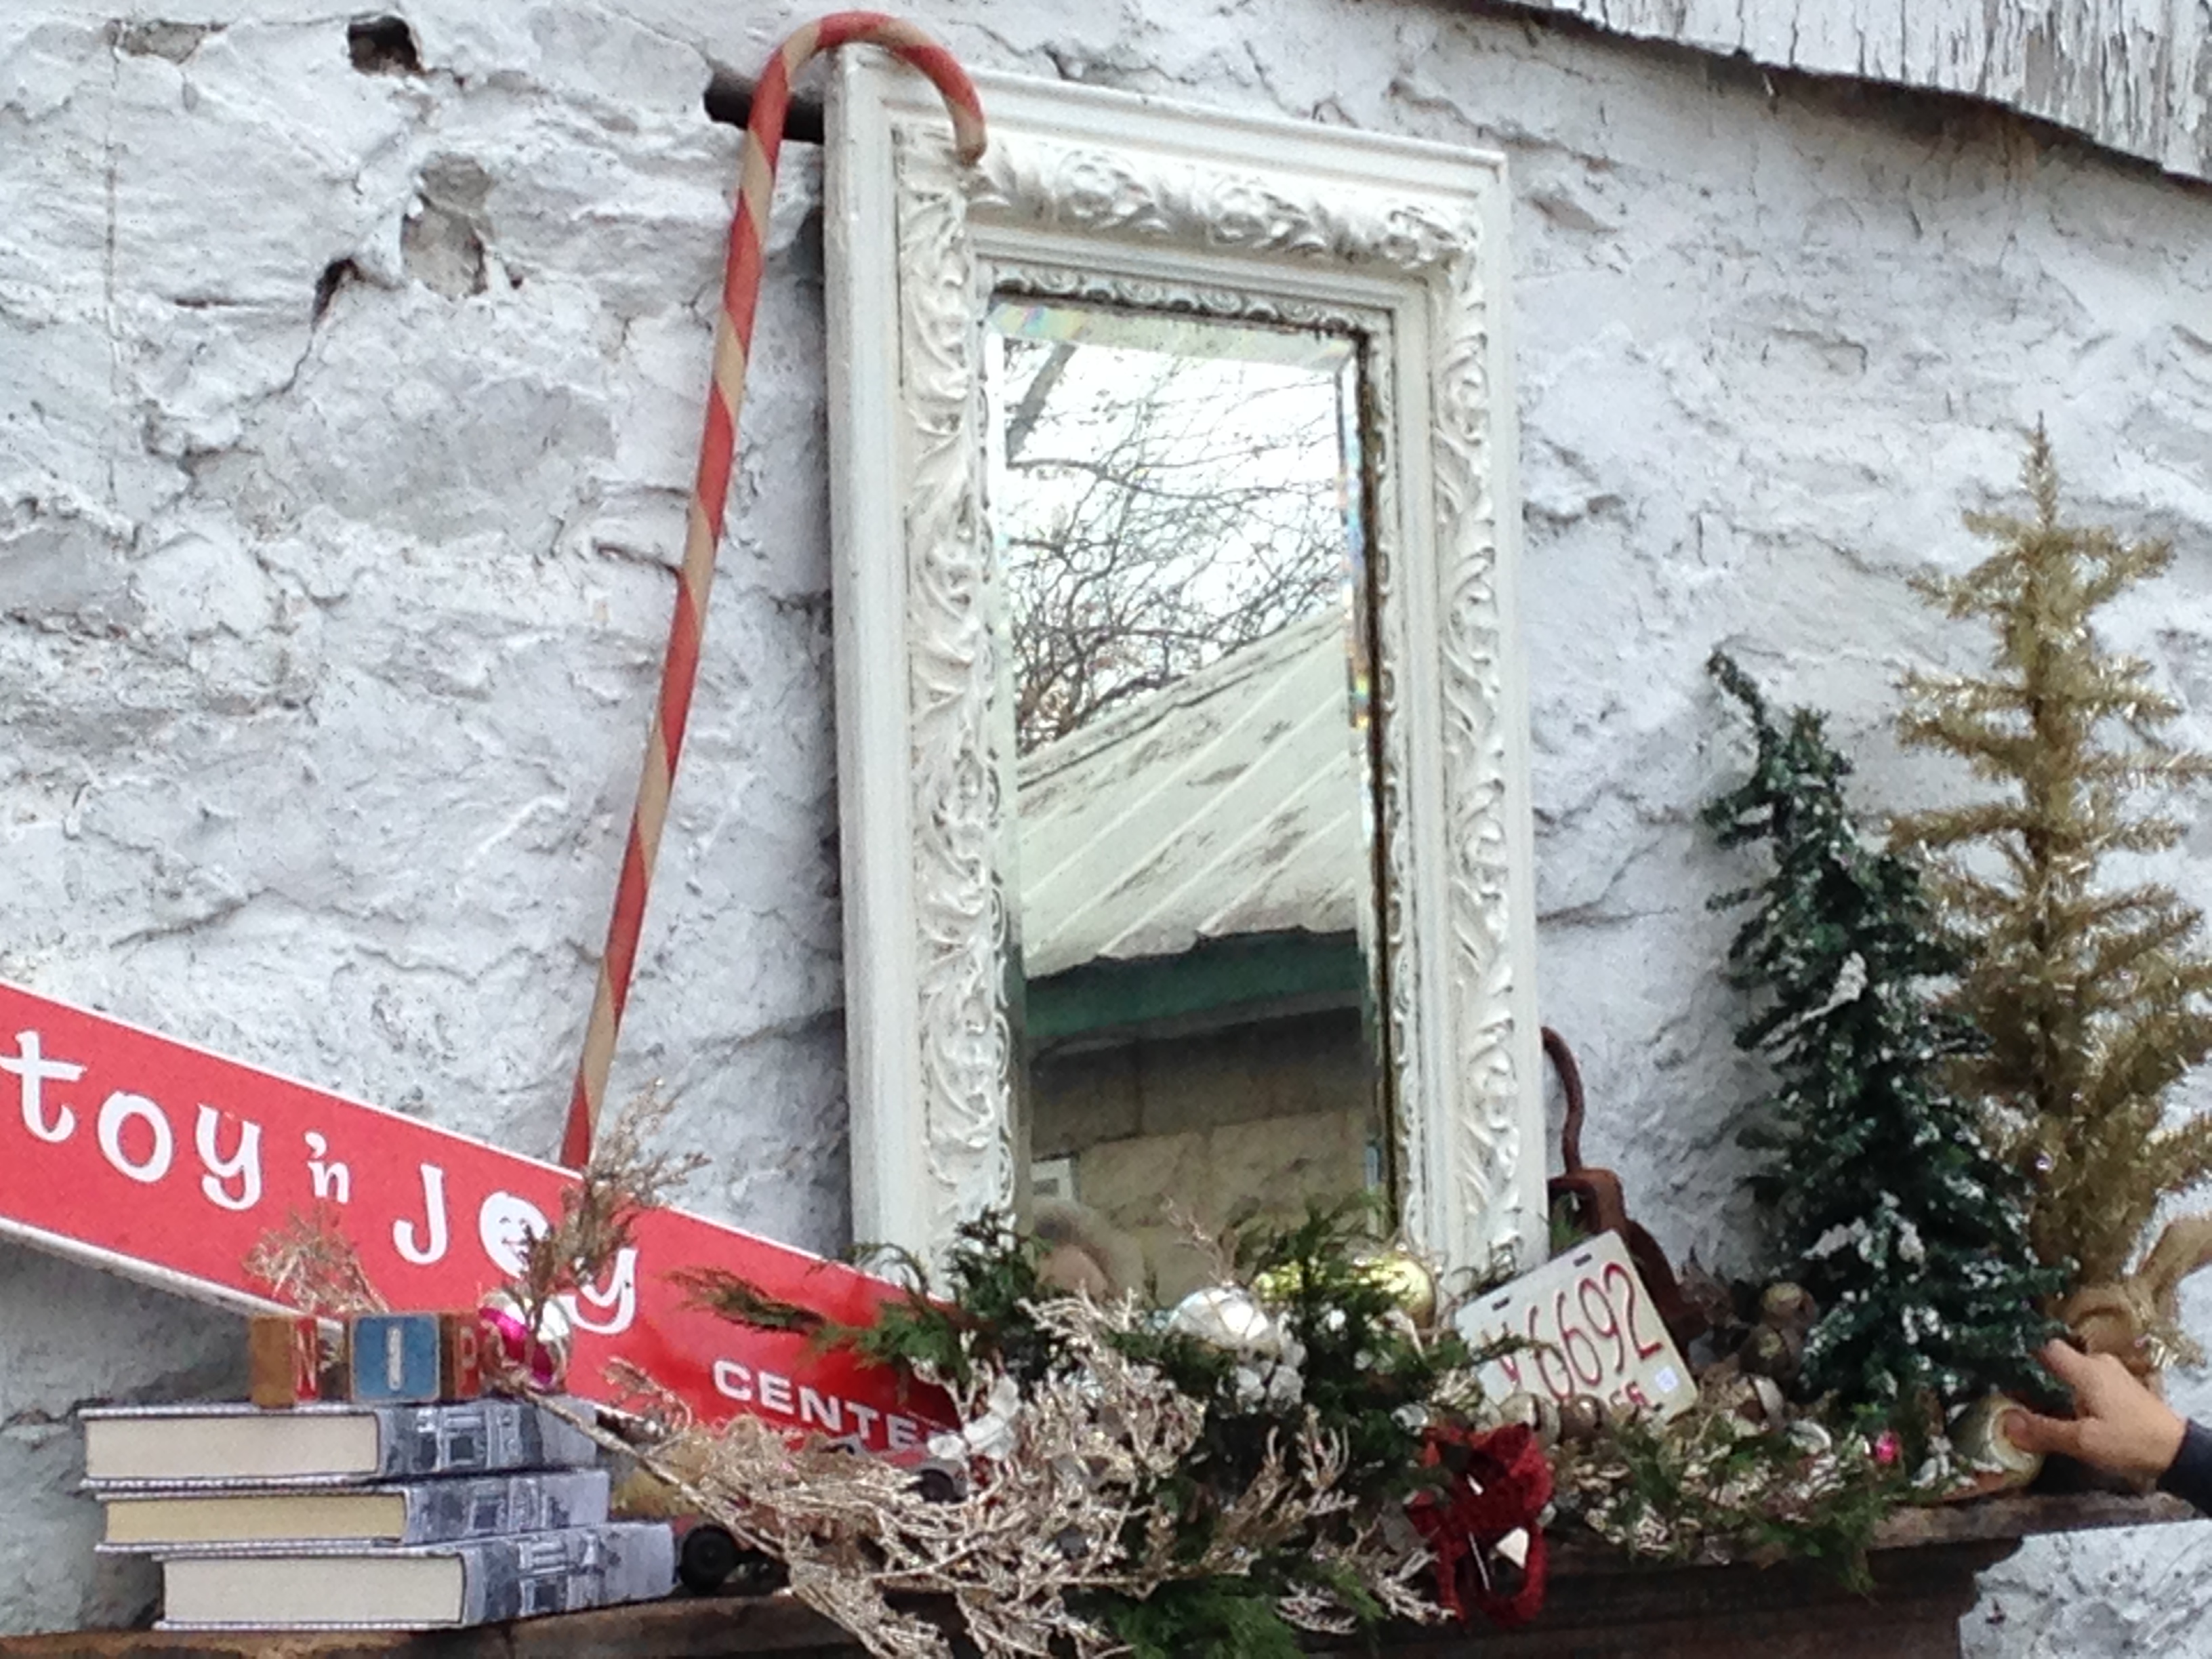
Step 7:  Add whimsy.   Love the playfulness added with this candy cane.  It also draws together the base to the full height of the mirror.

IMG_3728

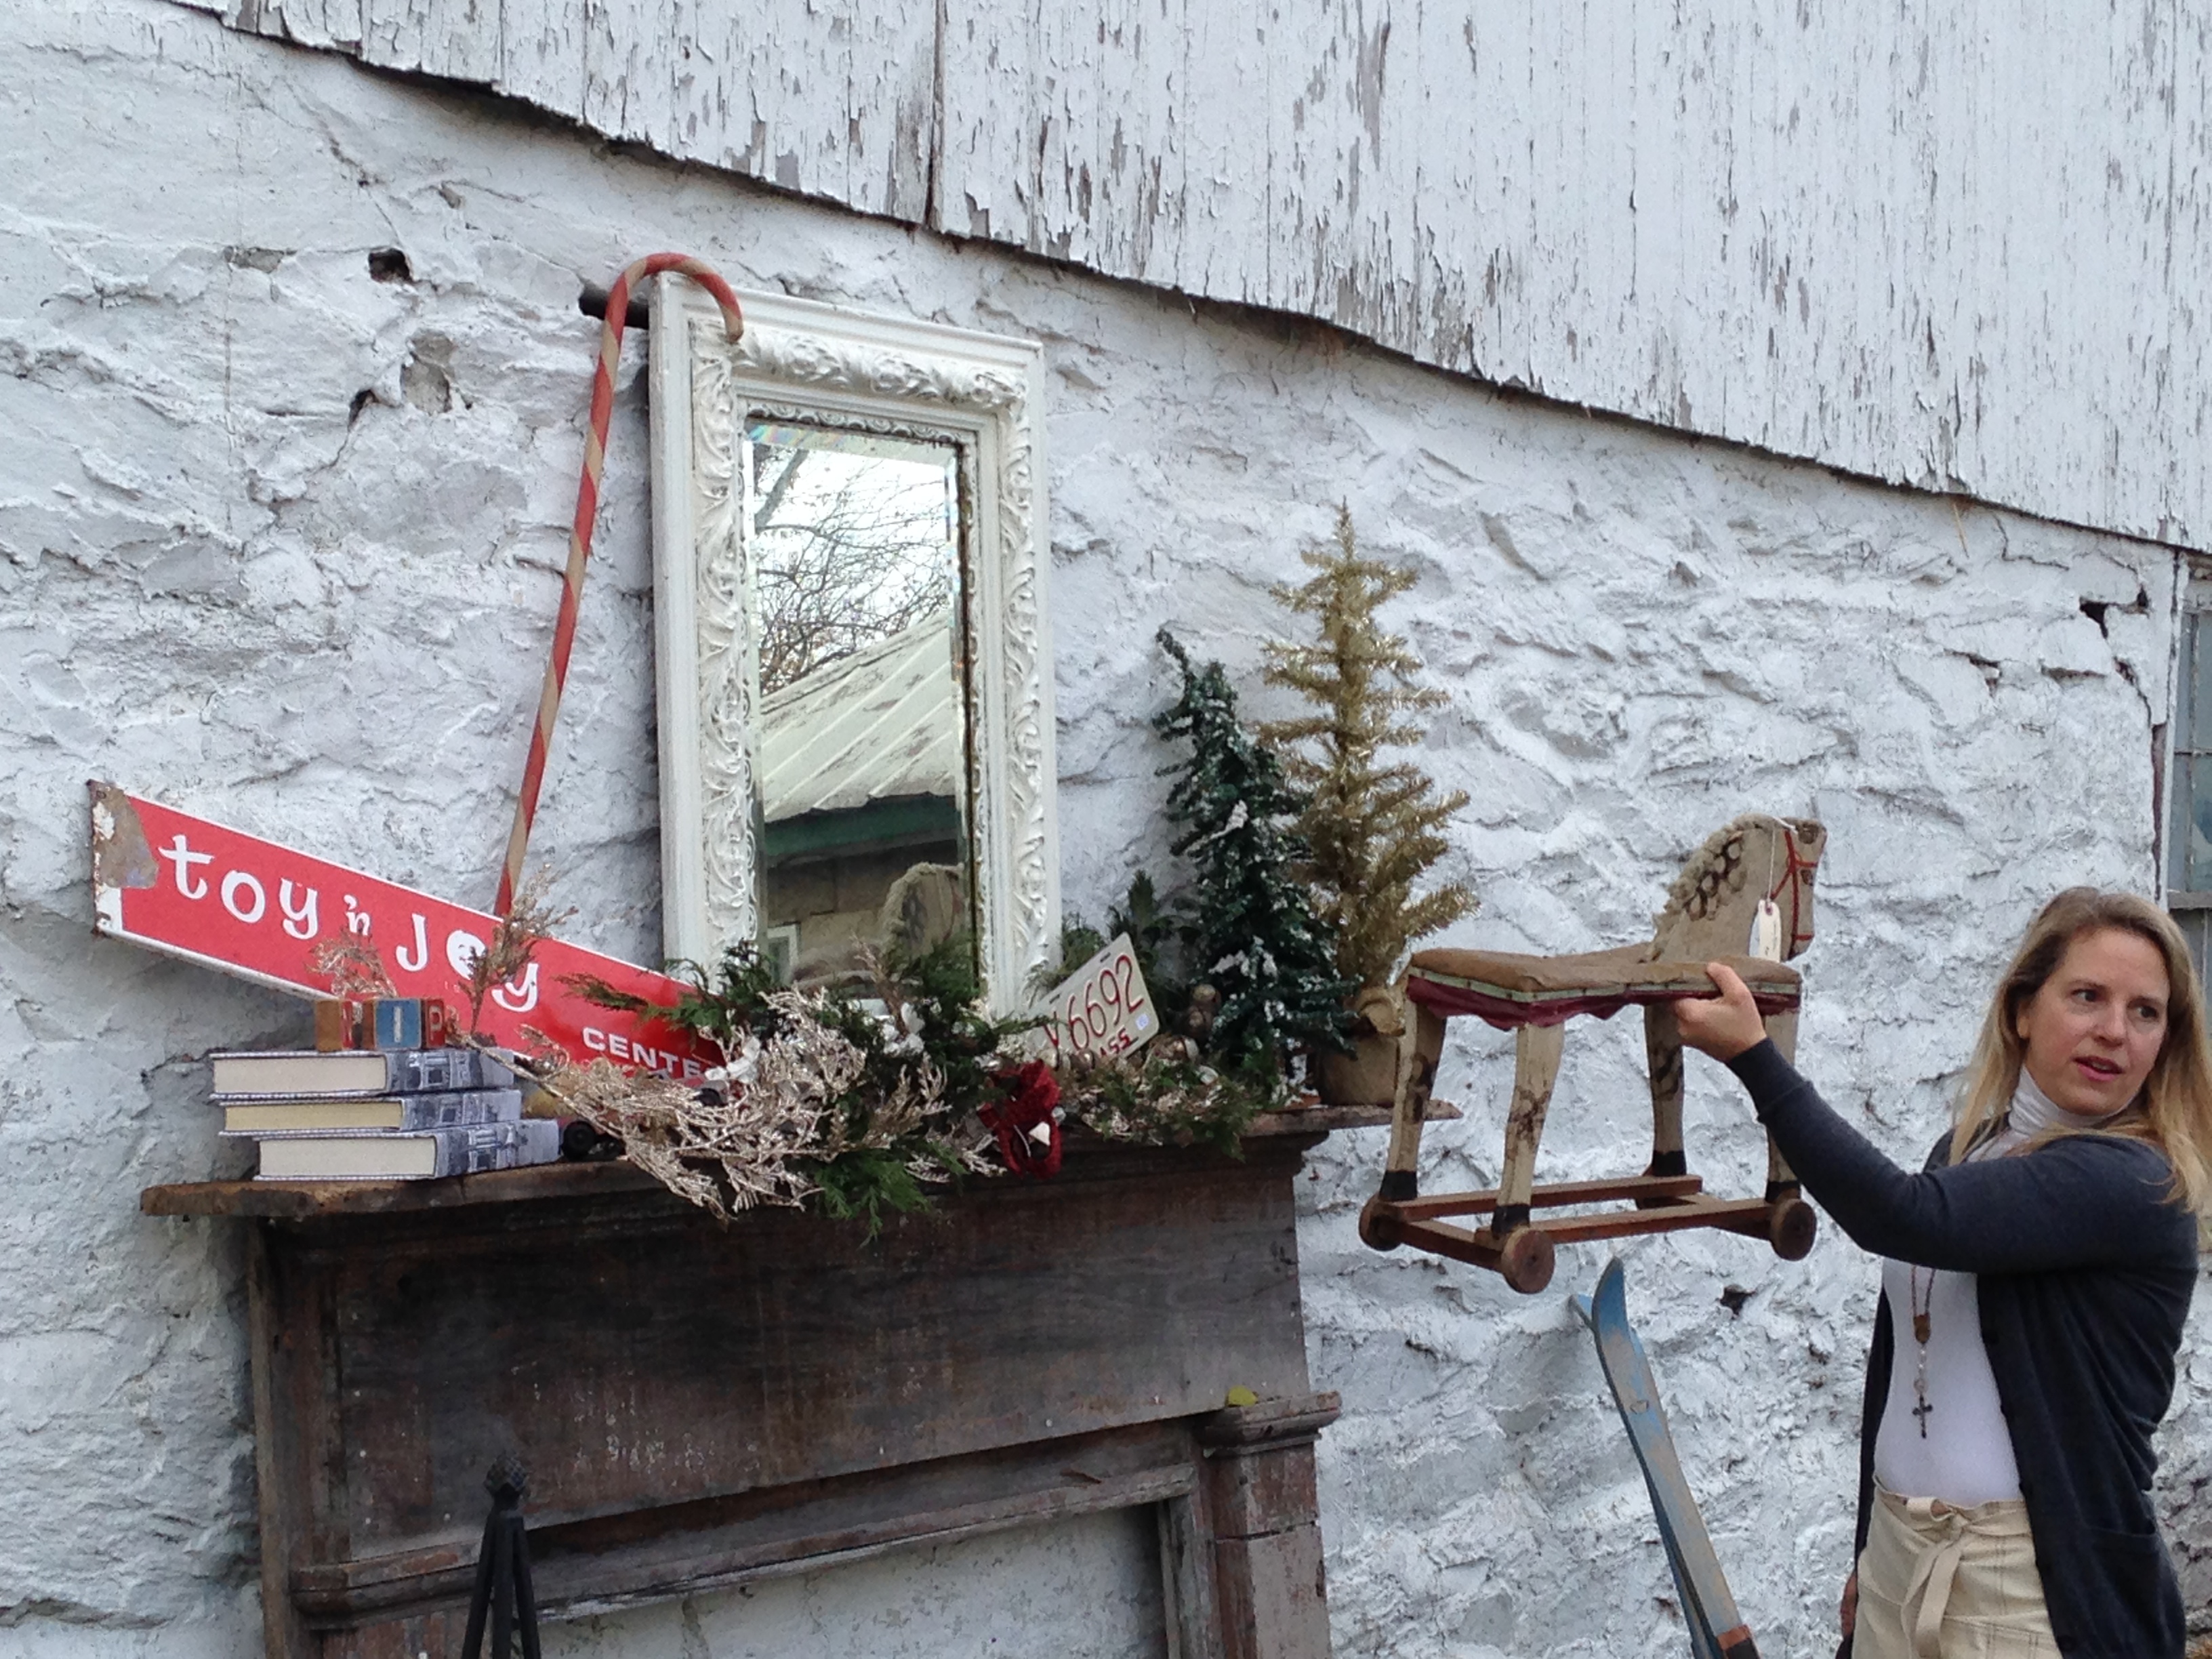
Step 8:  Embrace scale.  If I had room on the mantle, I’d love to use this vintage toy horse in the display.  Alas, it just won’t fit.

IMG_3733

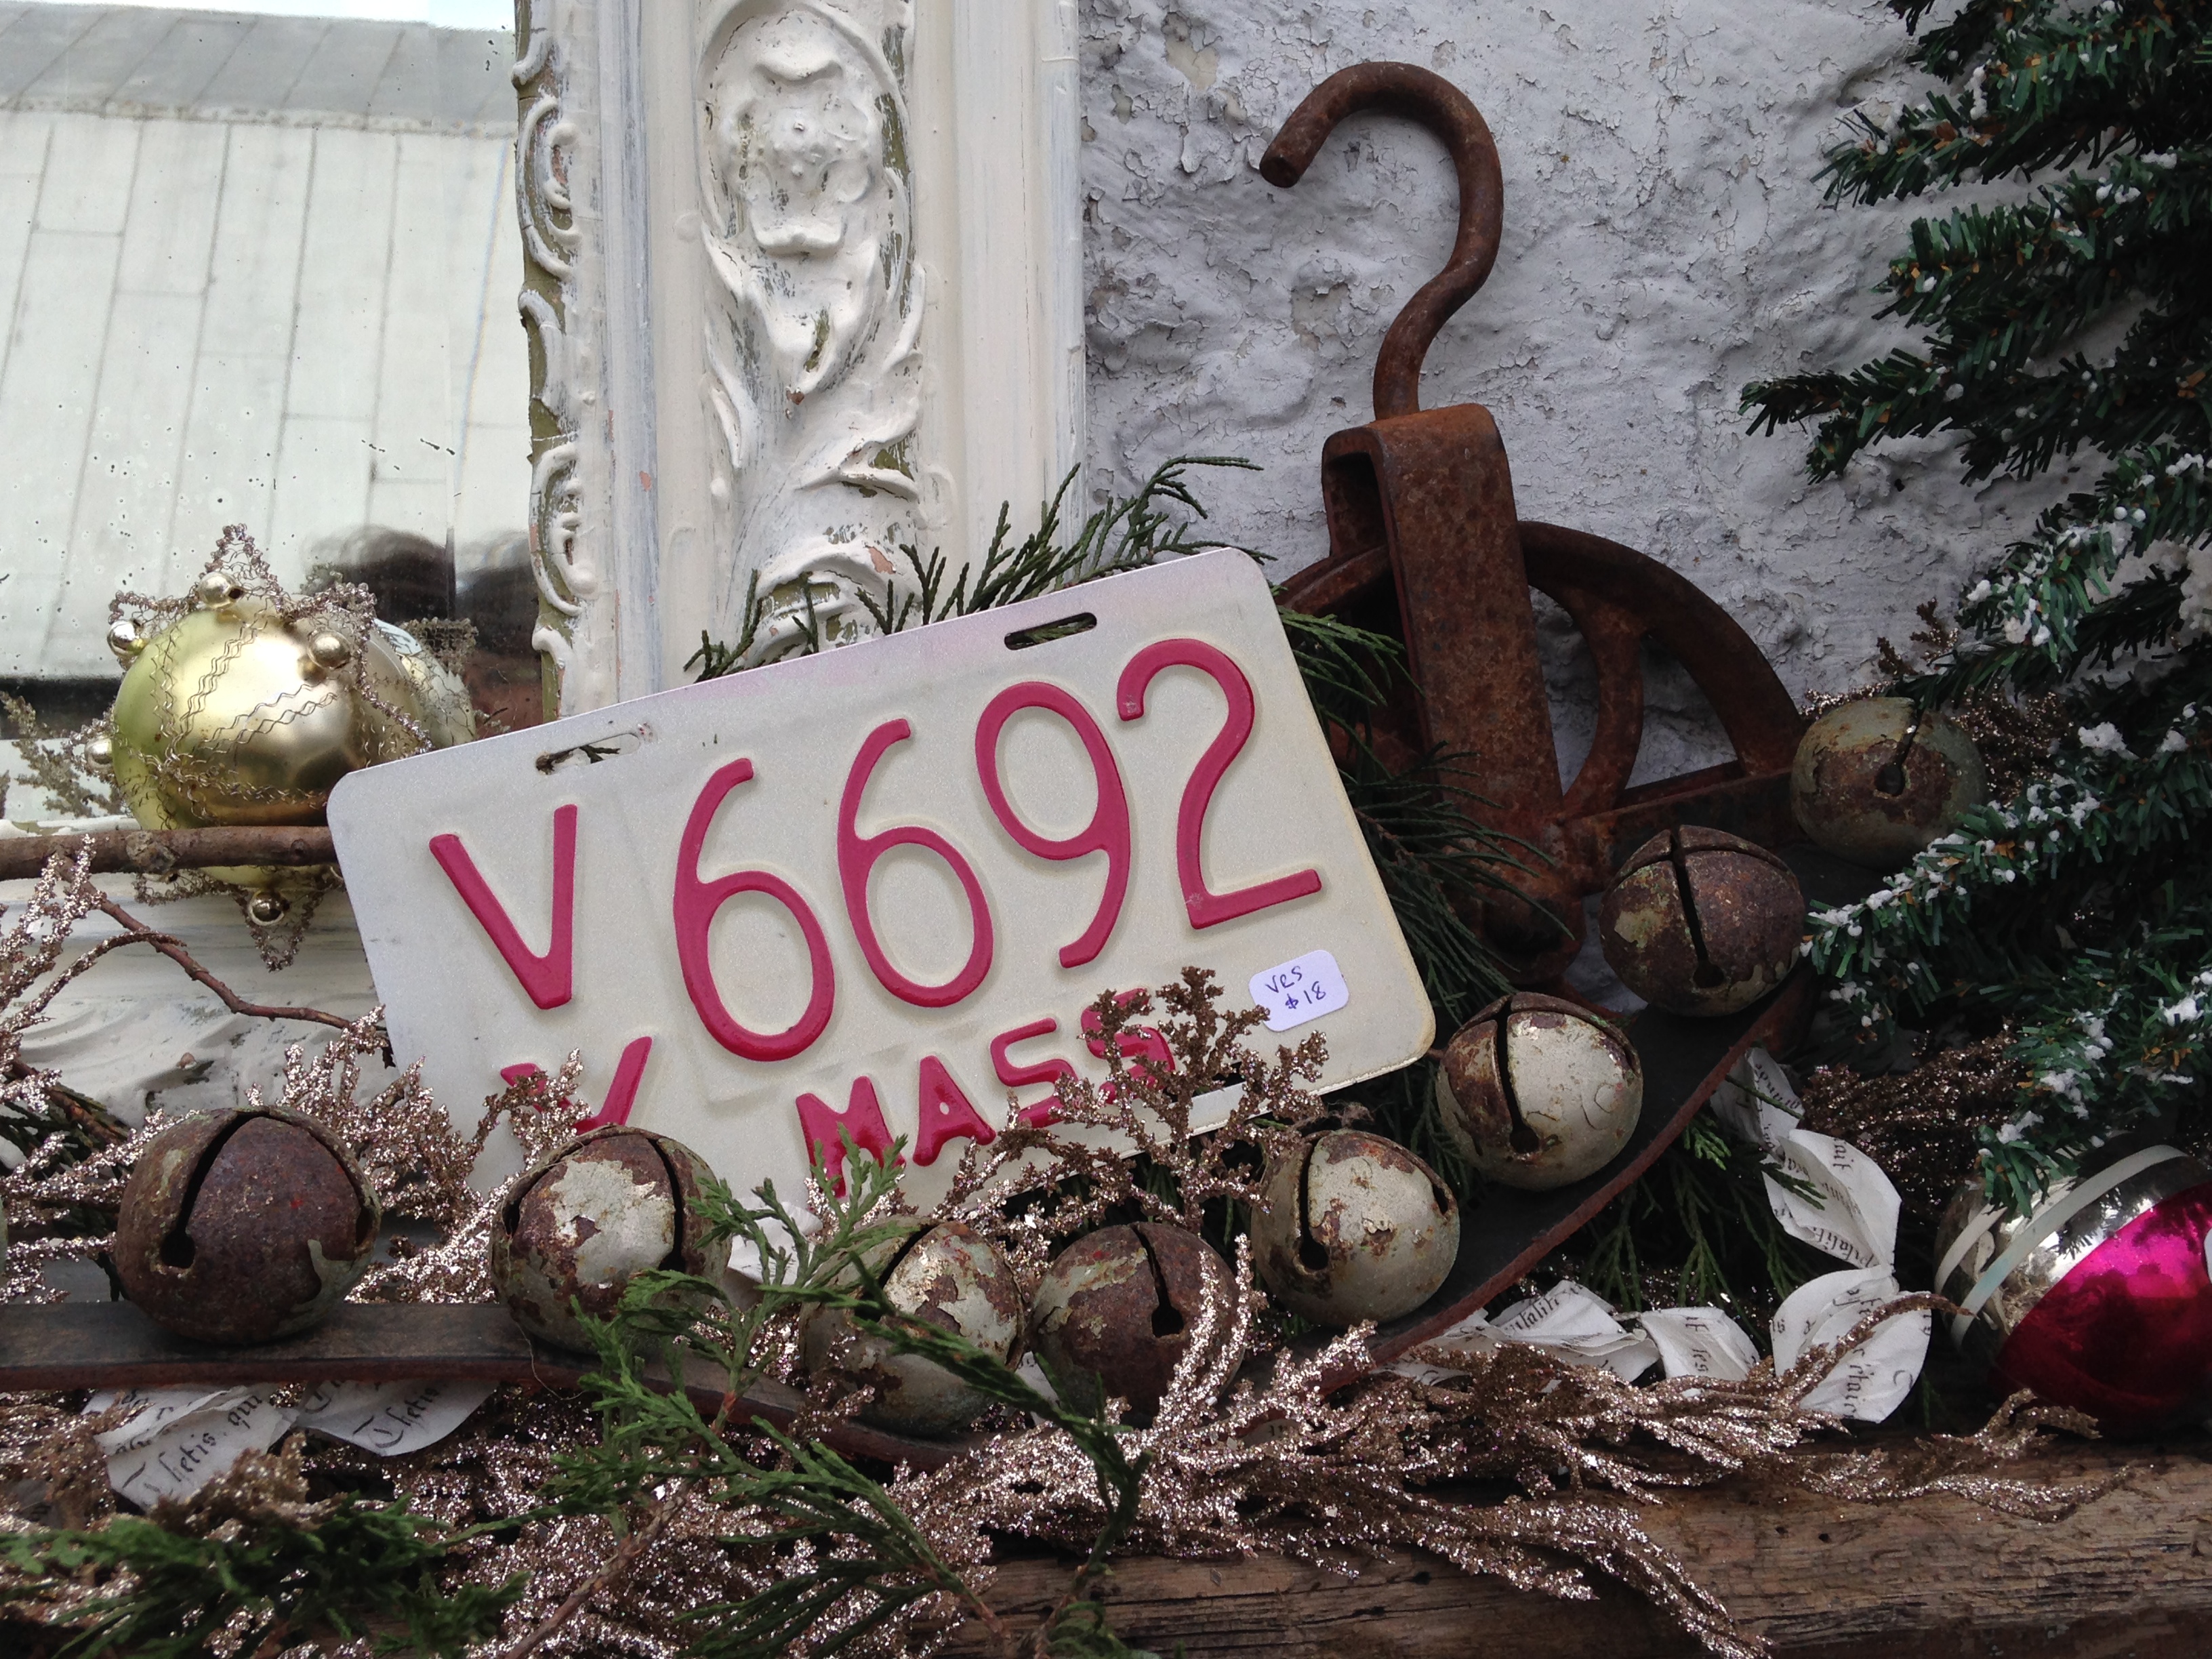
Step 9:  Add little details.  Tuck vintage ornaments among the greenery.

IMG_3742

Step 10:  Use graphics.  Add to the graphics of the toy store sign.  I’ve used the blocks to spell out N I P, as well as a little red and white bike license plate.

IMG_3743

And here’s the final product.  I love the richness and detail of this display.

IMG_3773

Note the little toy truck poking out from under the ‘toy ‘n joy’ sign.

IMG_3775

IMG_3778

IMG_3787

Step 11:  Don’t forget the fireplace itself.  If you’re not burning a fire, use this space to display beautiful items that integrate with your mantle.  In this case the blue child’s skis, candy cane, and oversized letters do the trick.

IMG_3792

IMG_3793

IMG_3794

Hope you found this inspiring and useful.  Let me know if you have any questions!

Thanks for reading!

Virginia

Read Full Post »

I just love wrapping presents.  I wrap them, stack them, beribbon them.  It just plain makes me happy.  Here’s a little of what I’ve done this year.

The silk duponi ribbon makes this stack of golden packages shine.

The silk duponi ribbon makes this stack of golden packages shine.

DSC_0663

I combined metallic silver mesh ribbon with sheer red for the bow on this one.

DSC_0664

The tone-on-tone of this one was a little more masculine (this stack is for Chip).

DSC_0666

I actually leave this nativity scene out year round.  It’s beautiful in its own right.

DSC_0667

Don’t fear using a big bow or ribbon on a tiny package.  This little box is no more than about 2″x4″, and the bow takes it way up in the “I’ve gotta open this one!” contest.

DSC_0669

Always finish off your packages with an extraordinary gift tag.  Think of the tag as the jewelry that completes the outfit.  Whether simple or over-the-top extravagant, the tag makes the package.  Remember – it’s the first thing the recipient looks at.

DSC_0670

Mix up the wrapping, and pull your presents together with a coordinated bow.  If you don’t have a gift tag that’ll work, tuck a beautiful card in.

DSC_0671

Here’s the riot of packages under our tree right now.  In years past, I’ve used all the same paper and one or two complementary ribbons.  This year the only similarity is the red and gold color scheme.  There are 3 different papers, and countless different ribbons.  I really like this effect.  And it was such fun making each present unique.

DSC_0672

DSC_0674

Try interspersing your greenery and holiday bling through all of your holiday displays.

DSC_0675

The pretty glass angel is a gift I just received this year from my aunt.  She tucked into my holiday greenery so nicely.

DSC_0676

I don’t know about you, but I’m very picky about the faces on my statues.  This little Christ Child is just beautiful.  I was so tickled to find him.

DSC_0677

Always bring as many candles to your dining table as you can fit.  The light is bewitching, and they’re so festive.  The red ones are a great new find from Bella Villa.   It’s a candle and super-ornate candlestick all created from wax – the entire thing burns.  So cool.

DSC_0678

If you love your displays from one season, just tweak it for the next one.  I just loved my sideboard display from fall, so I simply traded out the amber light branches for the frosted white ones.  Then I tucked greenery and glittering silver sprays for a dramatic Christmas effect.

I hope you’re having a warm and peaceful Holiday Season.  It’s actually snowing here today, and we’re having a truly whiter Christmas.  I’m so looking forward to heading out to Christmas Eve Mass in the snow, and walking through the streets of downtown Frederick as it becomes covered in its winter blanket.

Merry Christmas to you all!

Thanks for reading,

Virginia

Read Full Post »